Heal layer - a bit confusing in C1 20
Before it was straightforward ? Now I create a new heal layer, press B for drawing the mask and heal layer disappears and jumps to adjustment layer. Why is it so ? Could someone please advise the present procedure how to easily reach heal layer with the line and arrow to the healing source as always ? Thank you .
-

Wrong brush. You want to use the Q key, not the B key. Hitting Q will even create the layer for you if one doesn't already exist.
0 -

I see ... so Create Heal Layer and press Q for drawing the mask with the source ? And that's it ? Or even any direct shortcut without mechanically creating the new Heal Layer ? Seems pressing Q is the direct way ?
0 -

Q and heal… as Marco said, the layer is created automatically.0 -
Good, thank you ... now seems to be clear :)
0 -
Maybe one more question - what is the principle difference between heal and clone layer ? In both cases you copy a content from one place to another ?
0 -
Also, you don't need to select a source. Capture One will pick a source. In my experience the source selected by the program is good most of the time.
I assigned a key (\) to hide/display the circles and arrows. I keep them hidden as I heal as otherwise they can clutter the image. If the source selected by the software isn't to my liking I hit my key that toggles the circle and arrow display, move the source point circle, then hit the key again to hide the circles and arrows. I typically do my healing zoomed in to 200%. That seems to work best for me.
I've been working on scans of very old family negatives. This has given me lots of practice with the heal tool removing dust (my scanner is a dust magnet) and scratches on poorly stored negatives.
0 -
BTW - seems that in C21 we will have again to unlearn the shortcuts as we had to to in C20 . Q will be again used for something else as seen in the recent article. Maybe not ideal attitude for users ?
 0
0 -
In my experience it is not so but the edibility feature makes the tool a
hit in many occasion. Any given heal may be altered by clicking on it
so to activate it, reveal the mask and correct or by moving the source
point or by preselecting one. The same with the clone tool, btw.
The difference between the two is the the healing brush with try to "dis-
simulate" by creating an average — calculation required from CO — as
the clone tool will strictly copy the source point that is editable too.
Affinity Photo's Inpainting tool most reliable if needed.0 -
BTW - seems that in C21 we will have again to unlearn the shortcuts
as we had to to in C20 . Q will be again used for something else as
seen in the recent article. Maybe not ideal attitude for users ?I don't use any of the exposure or HDR shortcuts. You could remove
them and use them for some other function. I use H=heal, C=clone
for example.0 -
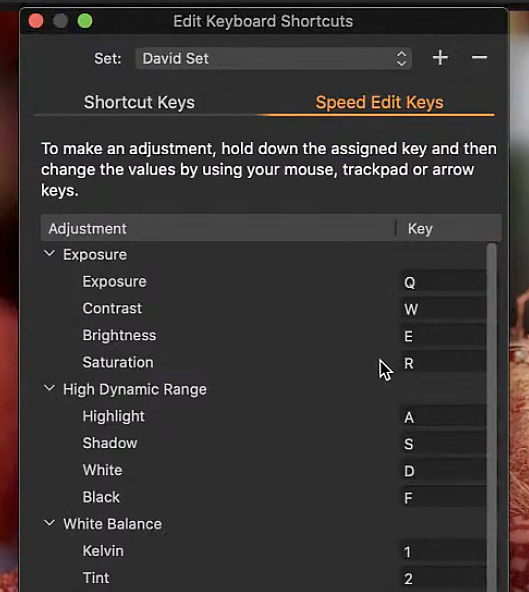
There was an explanation in the "sneak peek" video that introduced the Speed Edit feature about keys like Q being used for two things. If I remember right, if you just hit Q you get the heal brush. Or you can hold it down to adjust exposure with the Speed Edit feature. You'd have to check the video for details. And you can devise your own keyboard shortcuts if you wish.
I never remember that it's Q for the heal brush - I just click the icon for it in the layers tool.
Ian
0 -

@jj kk
Note the words on the text of your screen shot.
In particular "... hold down the assigned key ..."
There's nothing to be concerned about in that case.
0

Post ist für Kommentare geschlossen.
Kommentare
11 Kommentare