import raw modifies WYSIWYG

As I do not get an answer from support centre I'll try it with the community.
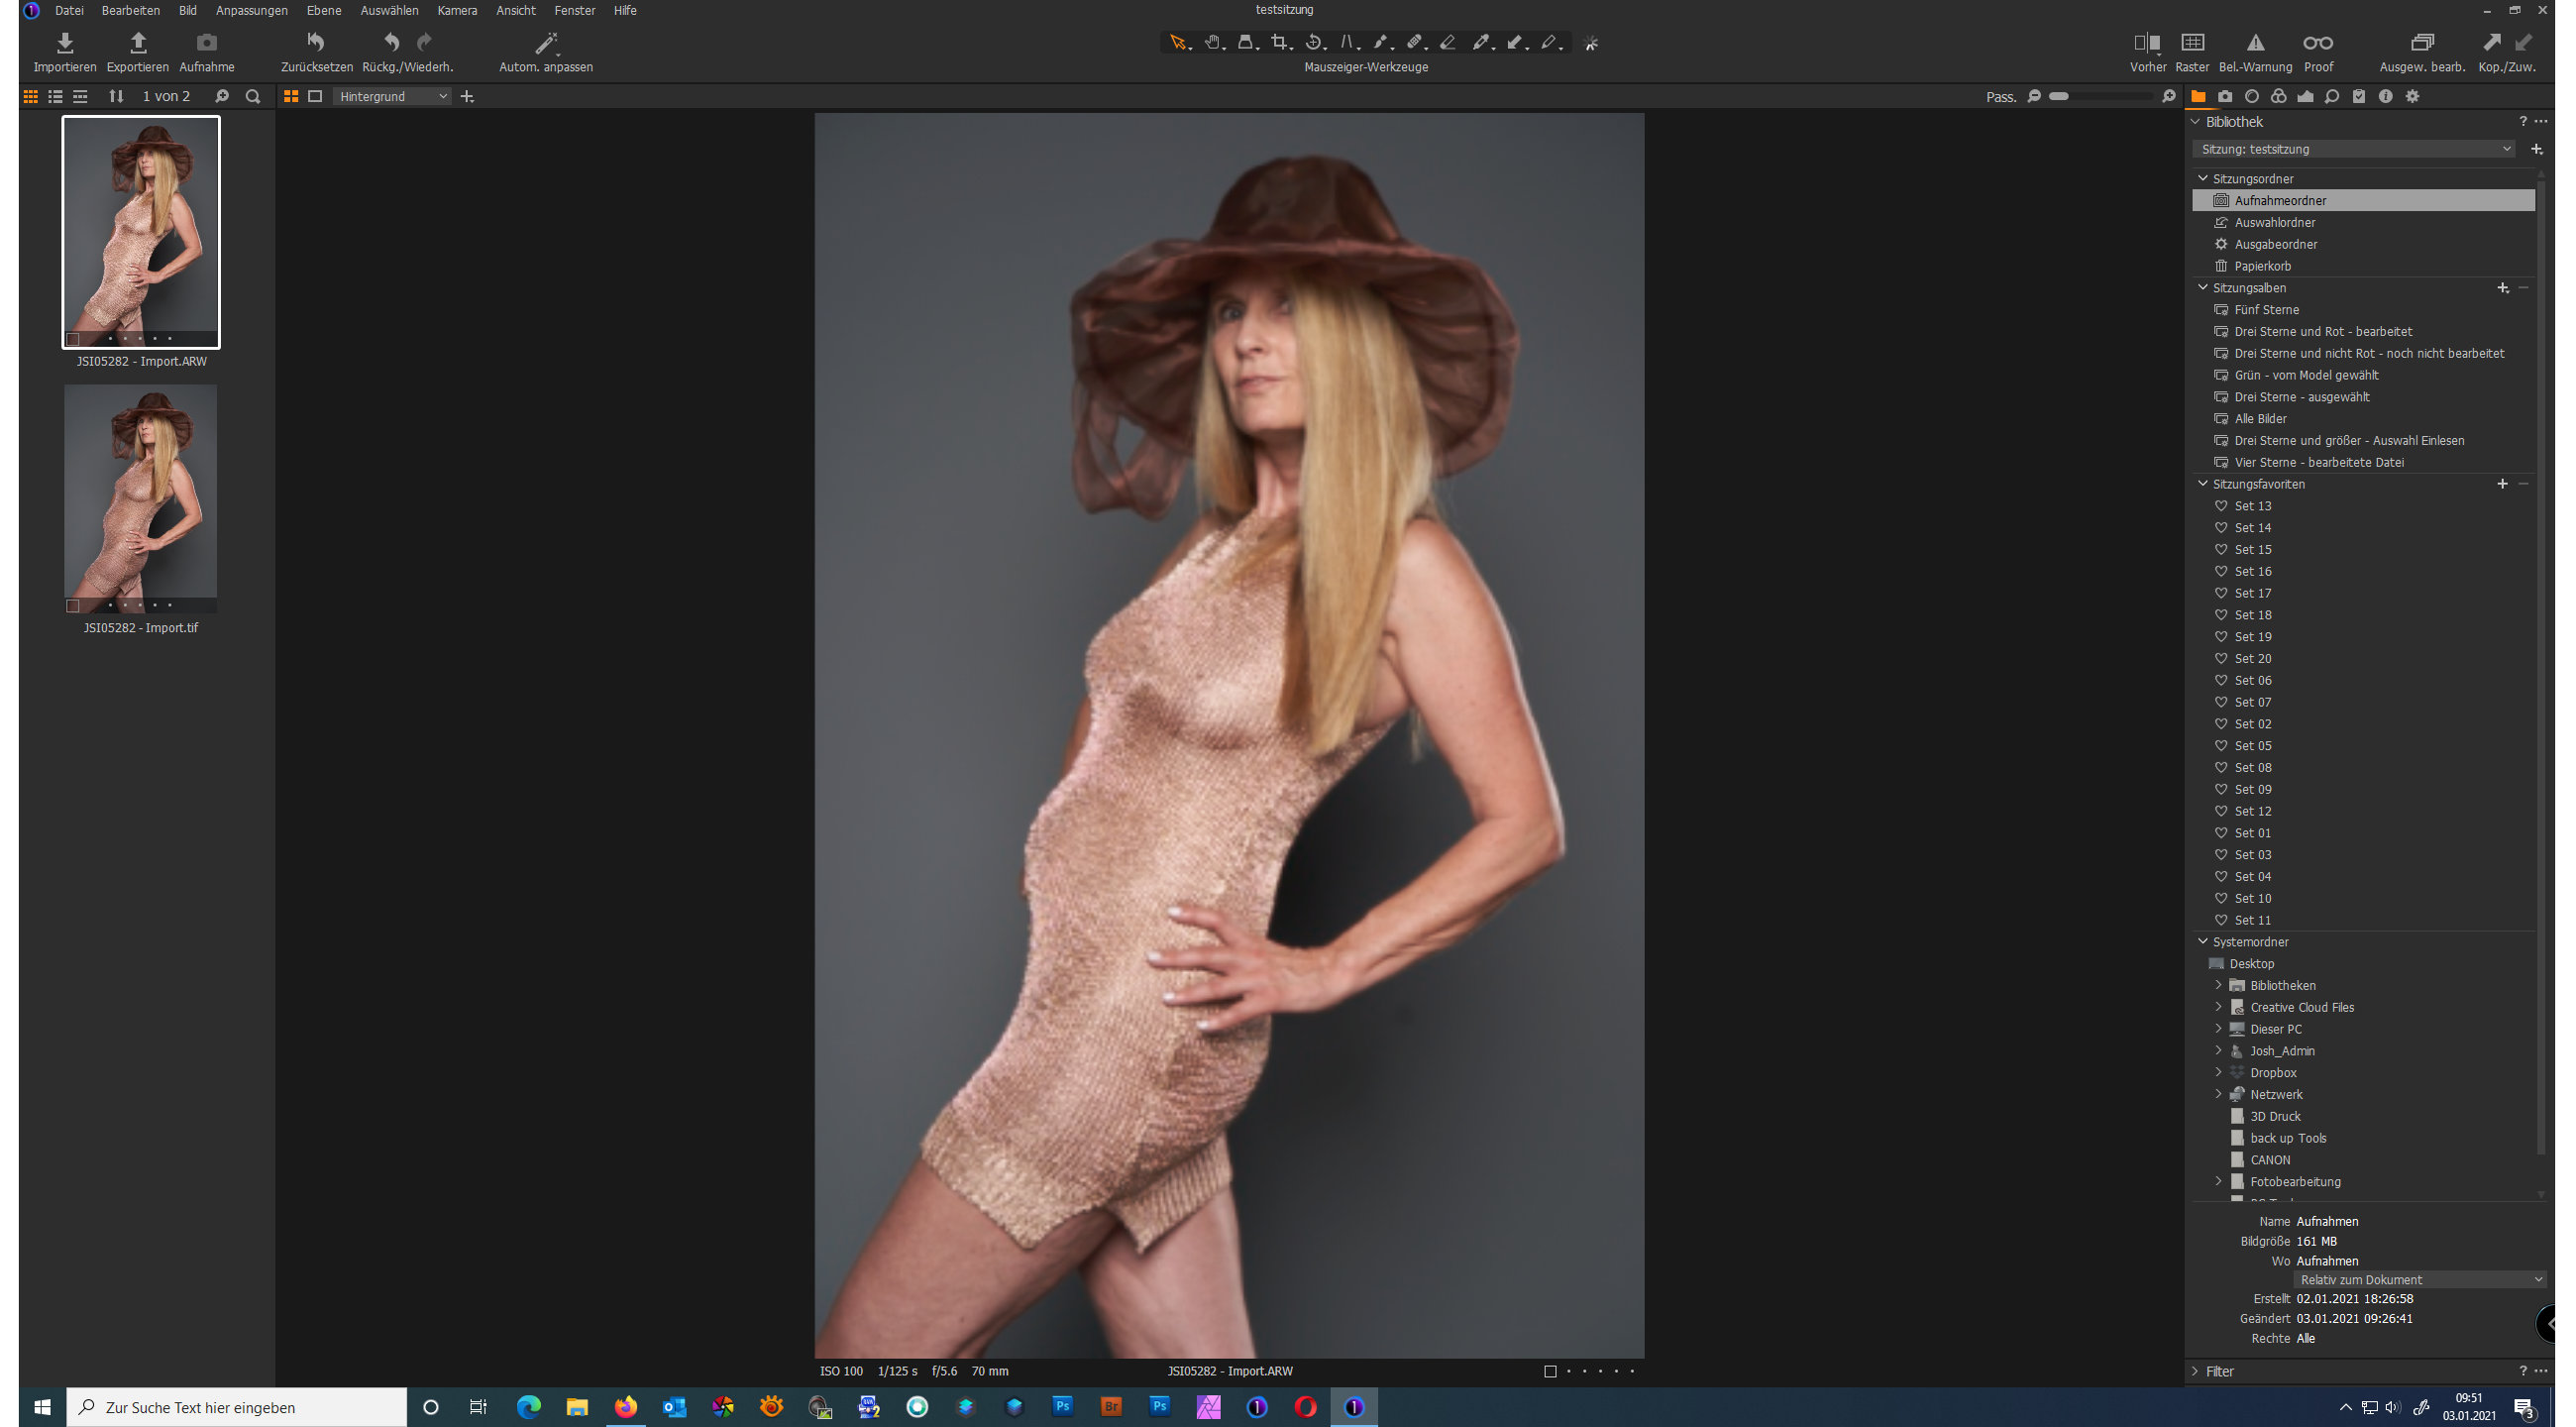
When I'm importing raw files, the pre view of the raw file changes to partly brighter pictures (not everywhere).
However when I'm exporting that raw file without any modifying to a tif file, it comes out as it was shown originally.
Finally if I'm modifiying on the raw file I can't expect what the export will do with the final file.
I did already a few tries, stop GPU support, import with/without automatic adaption, modify raw file to a most equal to original before do my wished modifications, ..... but unsuccessful.
I'm sure ther might be a way to get the original WYSIWYG, only I do not know what to configure in CO 20, latest version, running on a windows 10.
-

Jürgen,
What you have described sounds like Automatic Lens Adjustment being applied. This may result in a crop appearing that excludes areas of the image that are outside what is judged to be acceptable image quality. Not that any existing crop ratio for an Output Recipe might also influence how much cropping is applied.
You can turn off the lens correction and the cropping if required.
0 -
Hi,
That's what I thought to do.
There is not auto adjust and the lens corection is on default (manufacture profile) ... anyhow even with other lenses the same problem.
You can kill me for the pictures, but they show which problem I have0 -
 0
0 -
One in addition.
When I scroll to 100% view both pictures (oriignal raw and the TIF file export) seem then to be equal, but exporting results in the less brighter version whcih seems to be more the original WISYWIG what I can see even in the import tool.0 -

You initially see the embedded jpeg in the Raw. Then Capture One demosaics and displays the Raw file, which will have few in-camera settings applied to it.
0 -
Thanks for your attention.
That's clear.
But what do you expect for the WYSIWIG where you do your modifications (eventually sharpness, color, ...).
Which one should be the leading picture which you export, and shouldn't be the display on your screen not the one you would expect on outputfile?
If you have an Idea what to configure that I do change WYSIWIG, or am I wrong?0 -
Here's something to check (although I probably don't tell you anything new):
Main menu>View>Proof Profile: Check "Selected recipe".
Select the process recipe for your tif export.
Do your adjustments on the arw file to your liking.
Do the export via processing, not via export.
Then in the viewer component of C1 the preview should look identically for both the arw and the tif file (and the thumbnails in the browser too).
You should do your modifications of the arw file based on what you see in the viewer. (note the arw or imported tif are not actually modified as C1 never modifies original (imported) files)
0 -
Hi thanks,
yes I unclicked all automatic adjustments, even the automatic lens correction and GPU support.
Might be an idea to reinstall CO?0 -
I assume this issue is new to you and in the past your arw and tif files looked the same (in other words it is not a user/configuration/workflow problem)
Did you try restarting the computer? Reinstalling C1 might also be a good idea, and checking Windows updates / drivers are up to date.
0 -
BeO,
to tell you the truth.
I worked with this issues in the past for almost 2 years now (I started with version 11 or 12).
CO is a really heavy and great tool and I like it really.
All modifications to get the unexpected back to my wished results I've done with my photo sw later.
But now I'm on a point where I'm rethinking my workflow and it seems me that this way of working is not really ideally. Especially whem I'm playing with one of the best raw converters on the market.
What I was wondering is that only me have such a problem with it. Thats why I'm thinking it has to do with configuration.
What I'm doing now is to uninstall (windows and drivers are up to date) restart the pc and if it still does not work I have to switch to another raw converter. (hopefully not)0 -
After a lot of comparisions and a short survey I believe I got it, but still waiting for a solution form apture one.
1. In every File which has highlighted spots will be changed by export to a darker version on the highlighted spots. Doesen't matter what you do in preparation of the file.
You will see it more dramatically everytime you export the exported file.
There are differences on the original raw file, depending on the lense (if it is supported by Capture One or not and even how many of them you have in your picture.
Finally, an one to one copy (WYSIWYG) of RAW to export is never possible (by the way, most of the competitors do the same)
2. The Tamron Tamron 28-75mm F2.8 Di III RXD with Sony A7III is not fully supported by Capture One.
You can see it by importing of the raw file the distortion is not set to 100 automatically.
However for me it leads to a overhighlight on highligthed pxels which lead to a total different view in comparision of the original file and the output file (see also 1.).
You can see I have no solution but now it seems I know why CO acts like it acts.
Not good enough for a professional workflow but for an amateur it shall be enough, or?0 -
I don't have such problems, but I also admit I do not really understand your problem. E.g. what is "Highlighted spots"...
The raw file data is not visible, the raw developer (e.g. C1) demosaics it (makes image pixels out of the Bayer mosaic pattern) and applies default settings for tone curve, camera profile, noise reduction etc. etc., and then displays it in a preview window (here: C1 Viewer), also depending on the proof ICC profile (e.g. selected recipe). The export then creates a tiff of jpg file using the export (or process) ICC profile. If you import this file again to C1 it uses the ICC profile embedded during the previous export.
Maybe check which ICC profile is embedded in the tif file, see C1 Basic Characteristics tool. Maybe you see something unexpected. But maybe it is a different cause.
regards
0 -
BeO
hope this effect is only in my area ;-)
I checked it with different computers (my PC and my laptop) and the effect was the same (different ICC's, ....) (e.g. the eye light point (flash light in eye) is brighter on display of the raw as in exported tiff).
Even if I checked it with a known camera lens profile (CANON 5DIII and 24-70 2.8II) there had been a slight difference between RAW and exported TIF (always without automatic adjustments, to be fair).
The effect is much higher when you have shots with flash use, if you're using natural light the effect is quit not visible. I'm quite sure you will see that on your pictures as well, as it is most identical on most raw converter.
What I meant with highlighted spots. On some points/pxels you can't avoid that some areas are out of color information because of the flash.
Might be a fault of the photographer, but the result is what it is and finally what I expect to be shown in CO.
A different case is when you change on RAW what you see on your screen but the export is doing the modifications on another picture that finally the export can't be estimated.
If I first have to export the raw file to tif, before I do modifications which I can estimate/see, the raw converter is not really usable in this case.
Don't understand me wrong, I still believe CO is a very professional tool and if the configuration is optimal it works very well (you mentioned it, color base, file format, is changing as well).
The real problem I have is the very poor installation of the lens/camera interpretation in CO and together with the internal processing it creates a non perfect workflow.
If you have this camera/lens try to import photos from a flash used shot and share your experience.
I would be very pleased to see that I'm wrong and my workflow and usage is wrong. But to see what to do better (by the way I'm already waing for any reaction from support, a ticked is already open since last year - it's not so far:-) I know)0 -
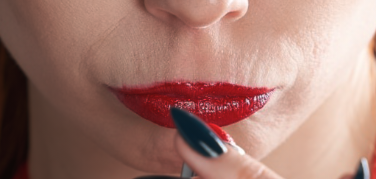
To give you an example of the highlight darkener (this time with a supported SONYA7III / 70-200 2.8
please have a look on the slightly sharpened lips.
In the original raw file (what I see on the screen) the highlight is white in the exported TIF (SRGB) it goes to black.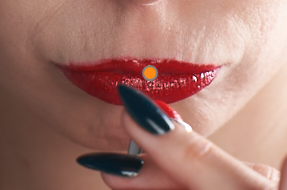
 0
0 -
I also have similar blown highlight spots like on the lips in many images, natural light outdoors, and I don't like how harsh C1 renders them and that there is no cool tool to mitigate it.
In the left image the spots look much sharper than on the right, which makes me believe you probably have disabled sharpening in the process recipe, which could explain the defferences you see (raw preview vs. tif file)
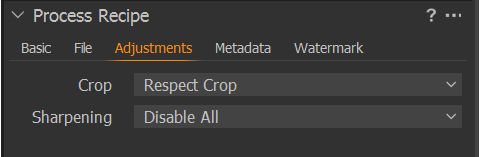 If so, try setting it to "no output sharpening" and compare again.0

Post ist für Kommentare geschlossen.
Kommentare
15 Kommentare