HIghlight makes almost no change ...
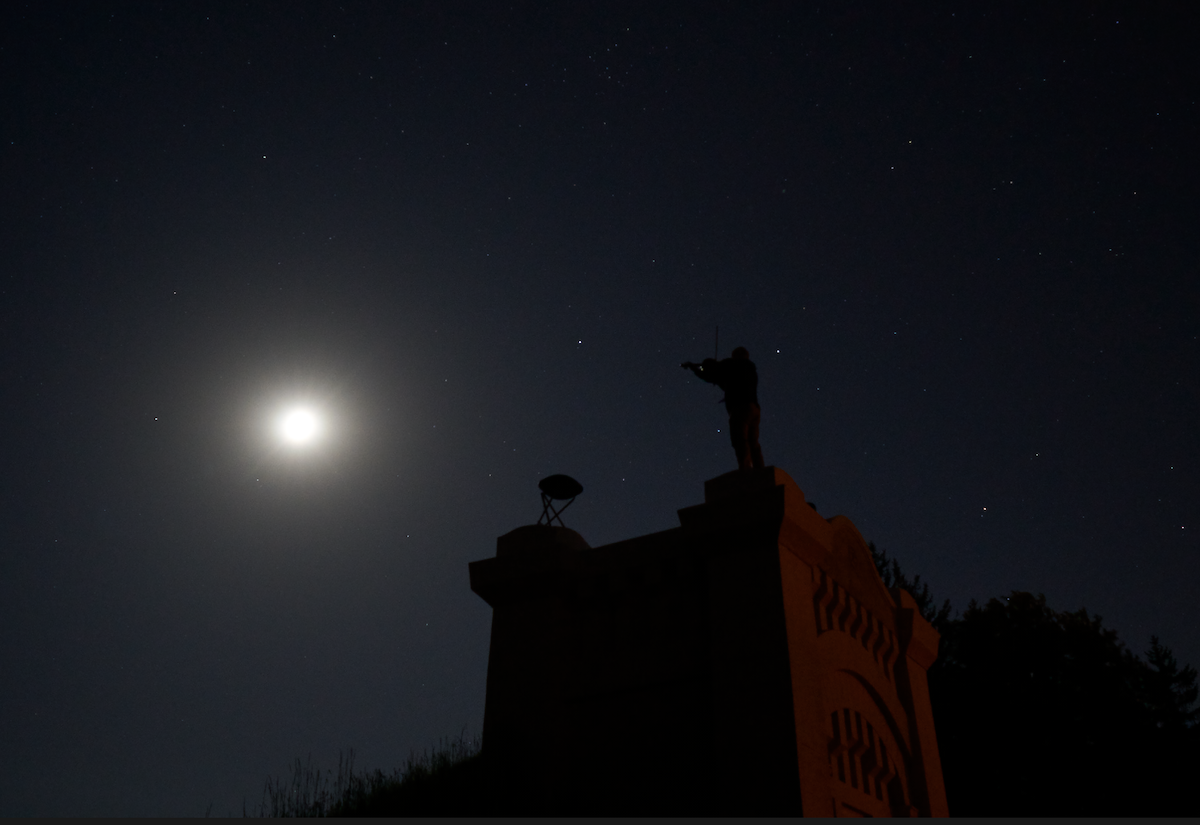
I find it really strange that highlight tool works so weak. For example on this photo it does not work at all. Here you can see highlight and white on maximum and on the other photo on minimum. Basically no difference (!). Doing exactly the same in Lightroom (maximum and minimum highlight on the same photo), the difference is enormous ... How is it possible ?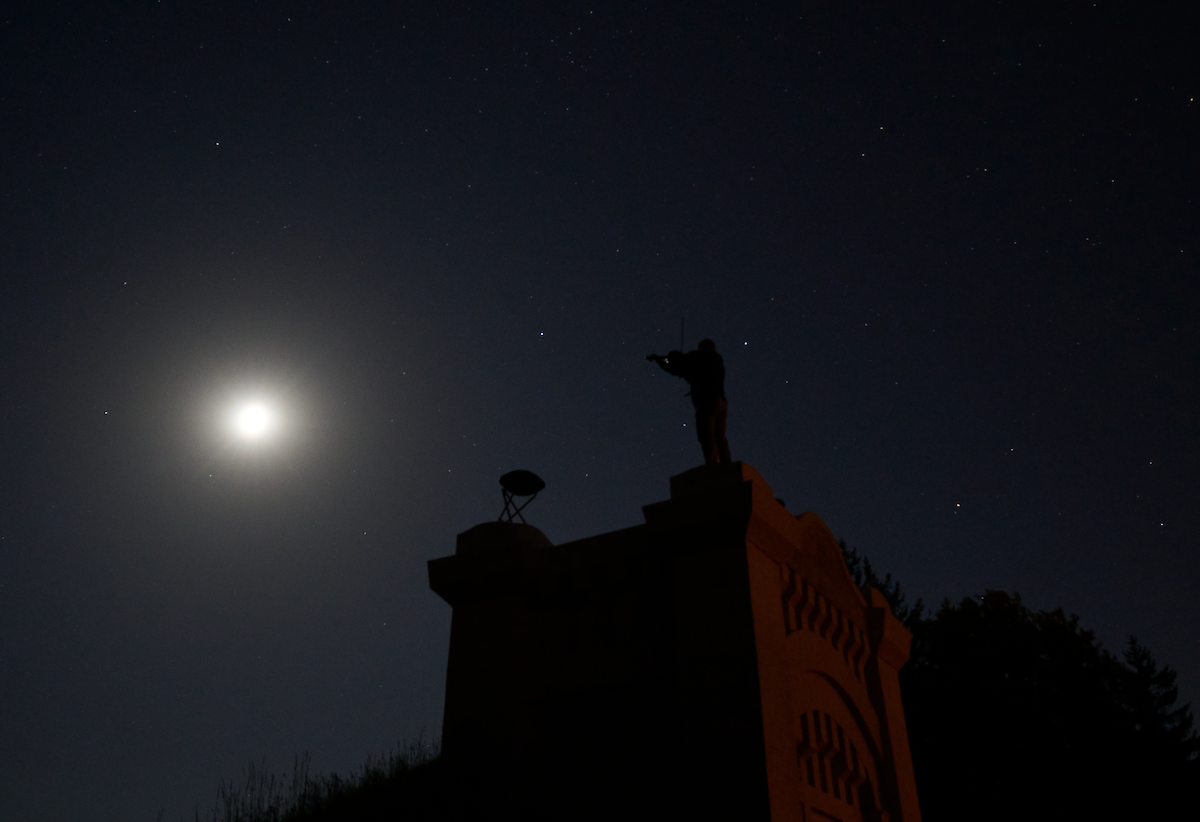
-

 0
0 -
Perhaps the reason is that the highlight is so blown out that there is nothing to recover.
Ian
Edited to add: in fact it seems to me that in the second version with the highlights and whites turned right down the moon is actually a little less bright, but still it will only be slightly grey, and nothing will really be recovered. You could verify what is happening by hovering the pointer over it and reading the values at the top of the screen. If they all say 255, it is all blown out still, but if they say something a bit less than that then the slider has had some effect, but not anything that would be useable.
0 -
Well, the interesting thing is that the highlight function in Lightroom made a huge difference (min/max)
0 -
Yes, it may have made it dimmer, but did it recover any detail?
Ian
0 -
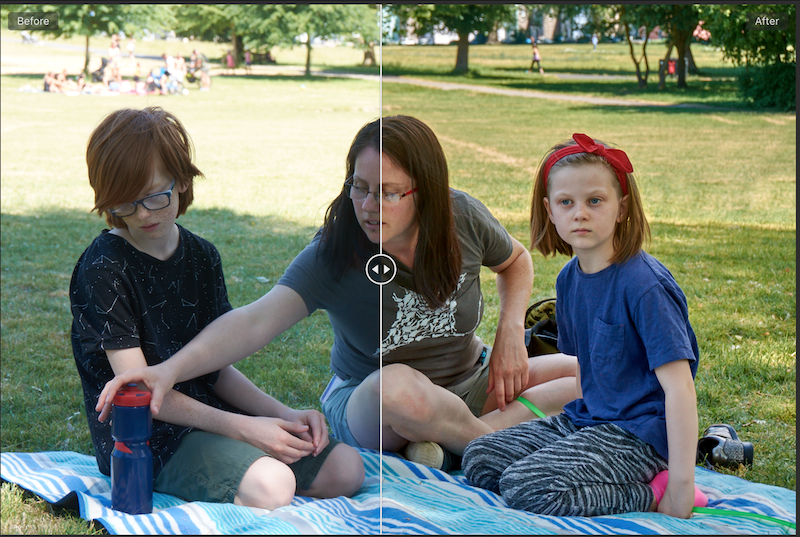
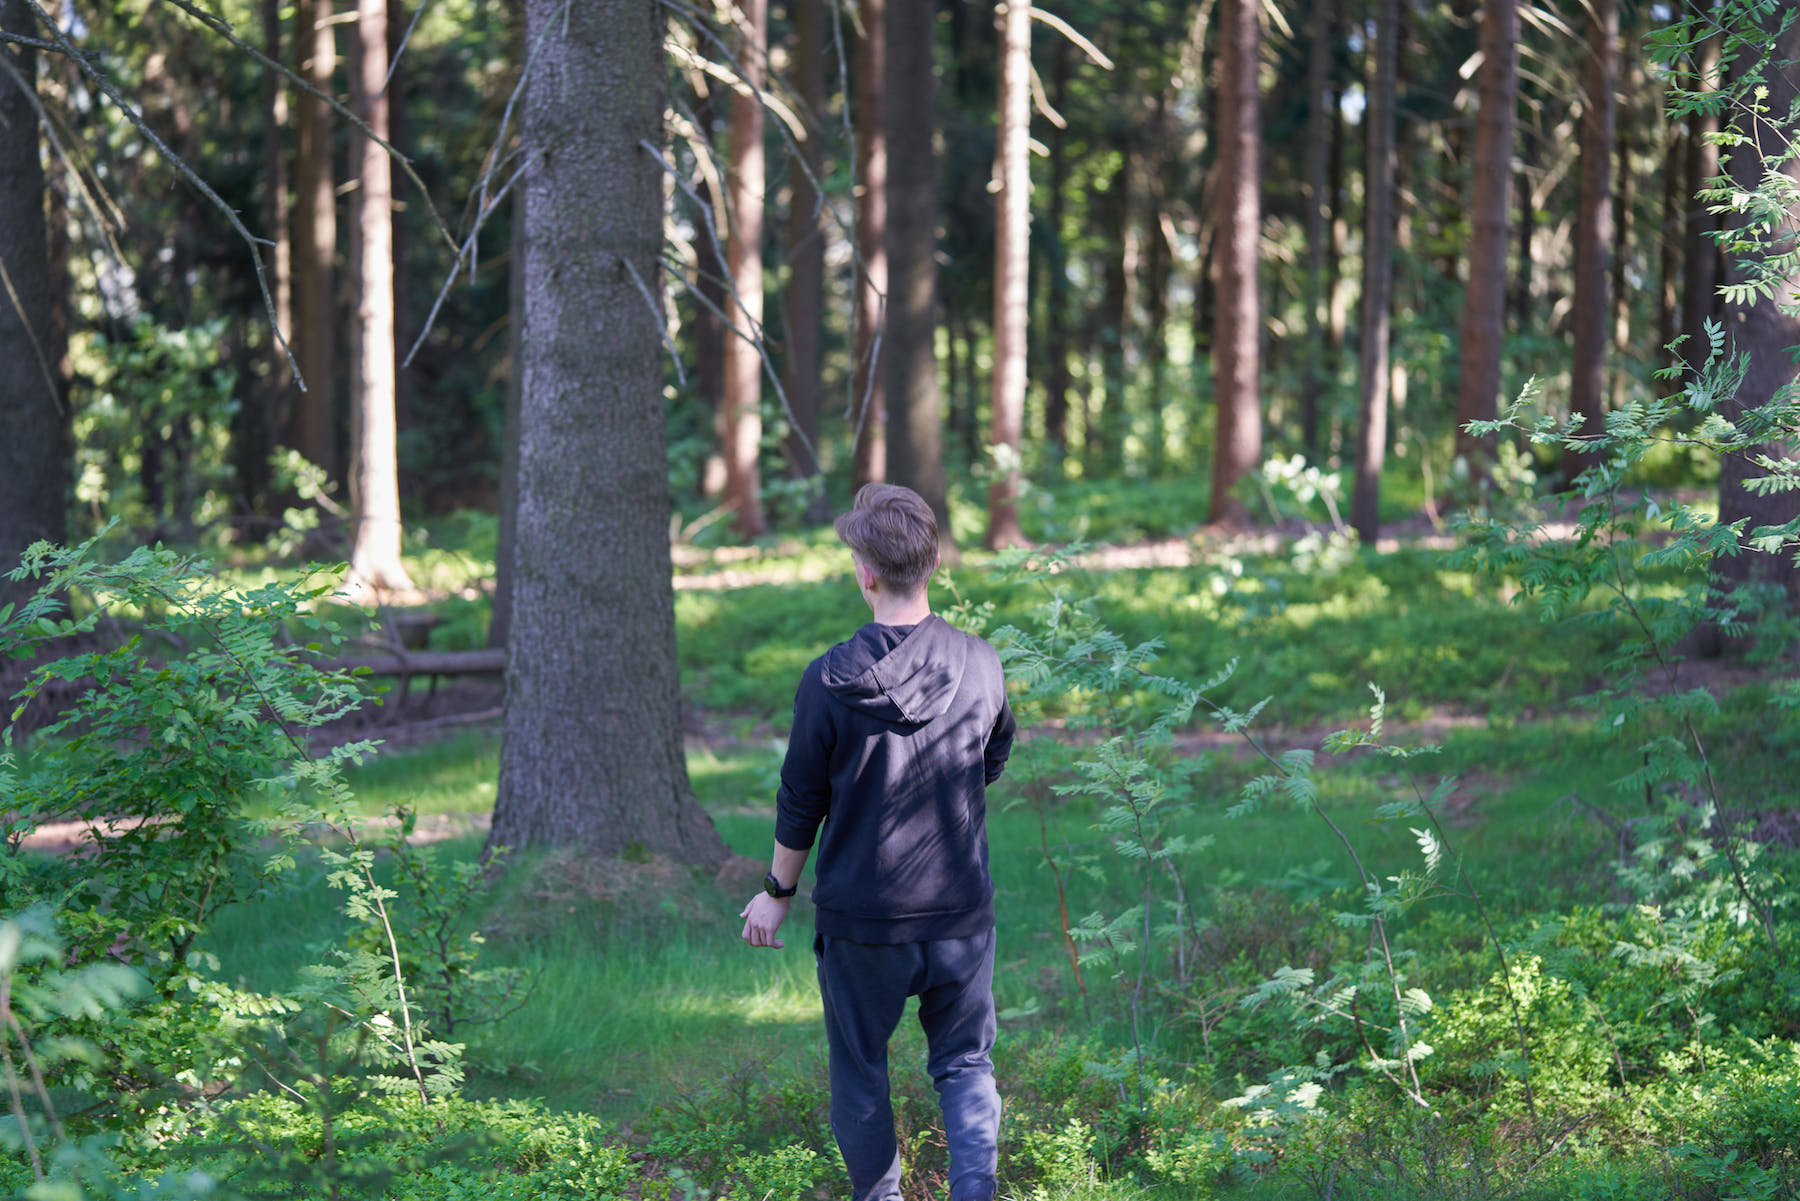
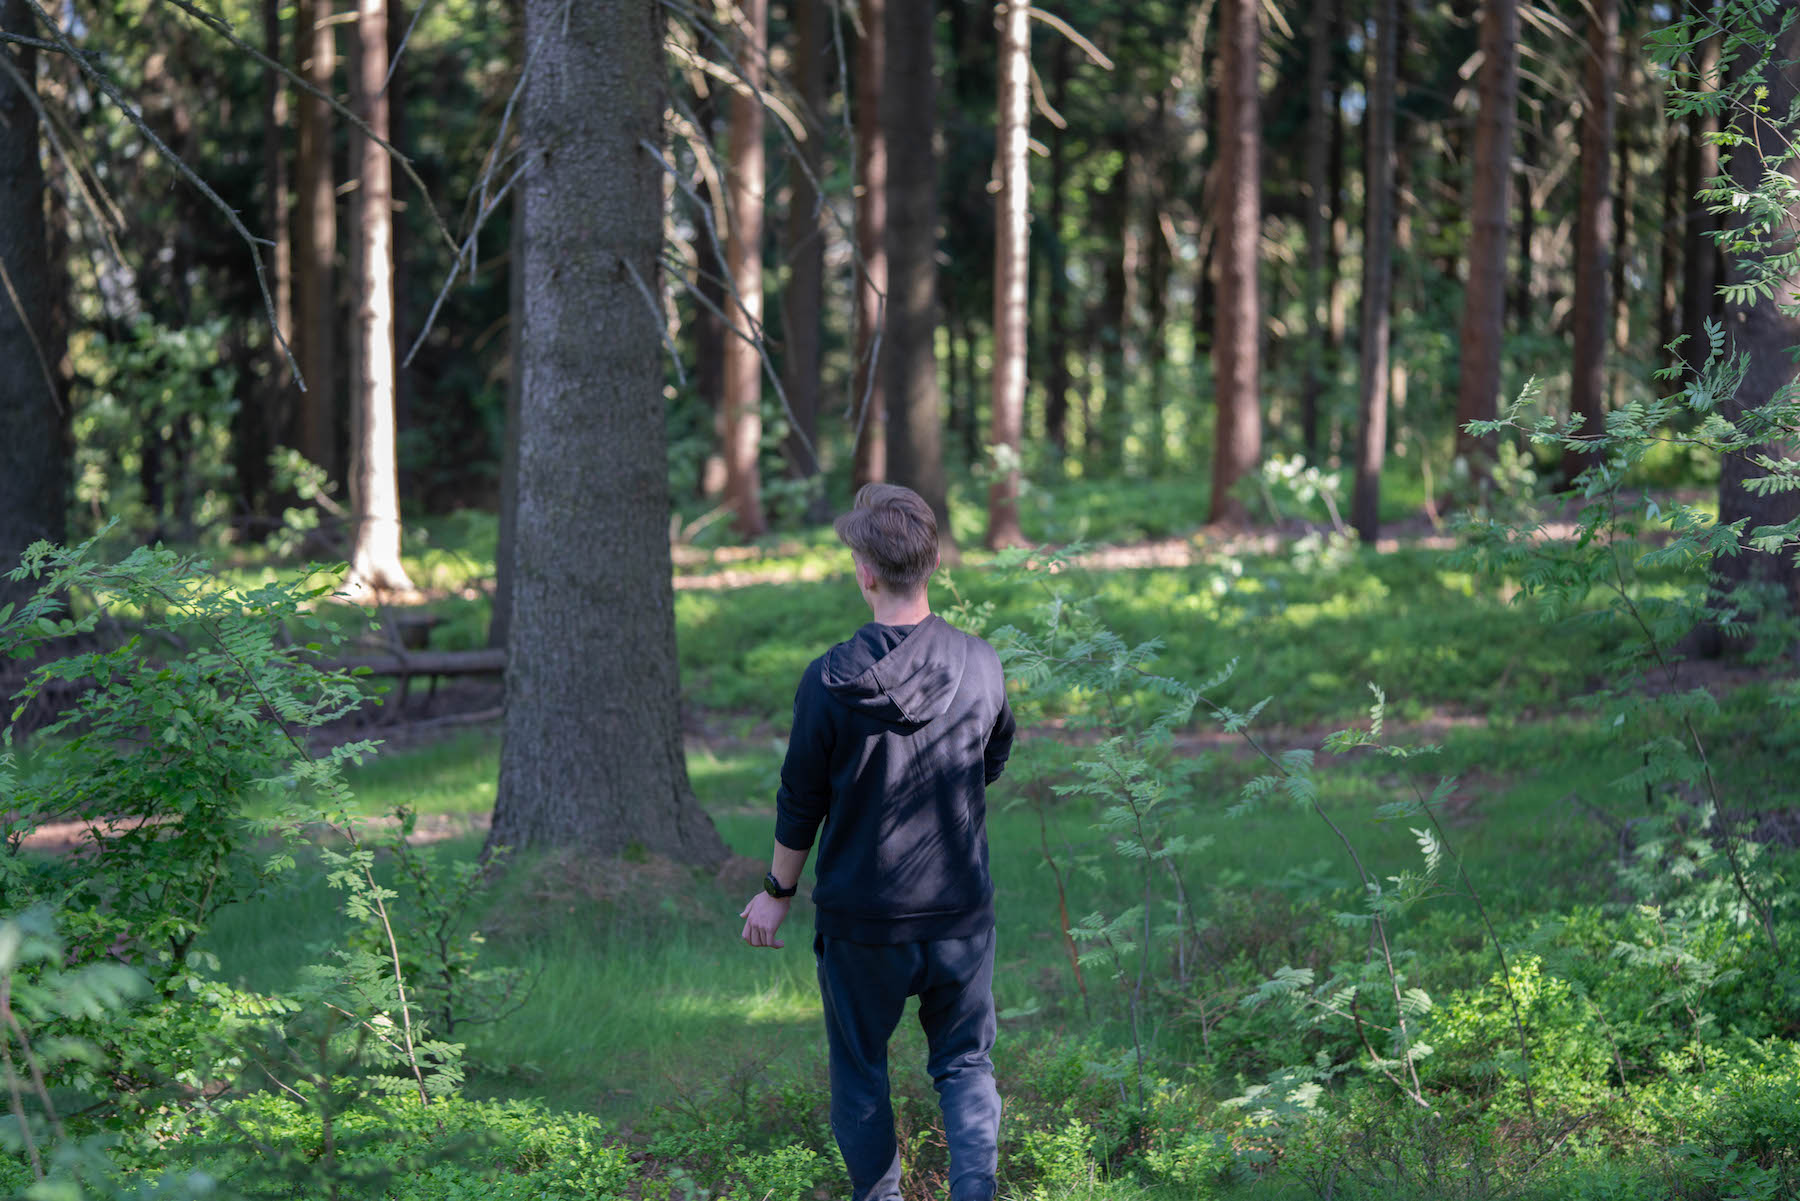
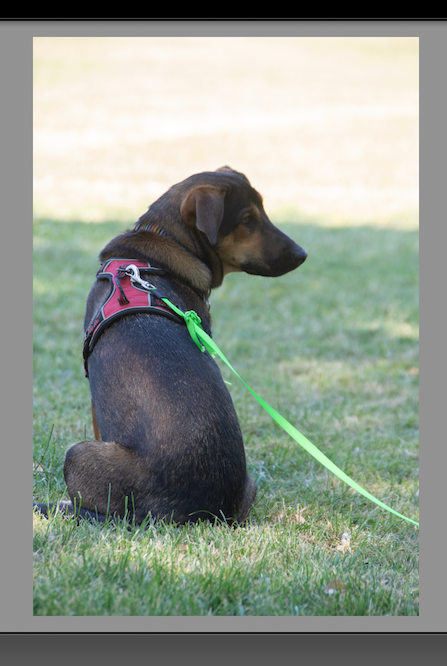
I generally find that it has a pretty good effect, if there is any data there for it to work with. For instance this afternoon in the park. (Not the only adjustment here, of course.)
Ian
 0
0 -
Hi jj kk,
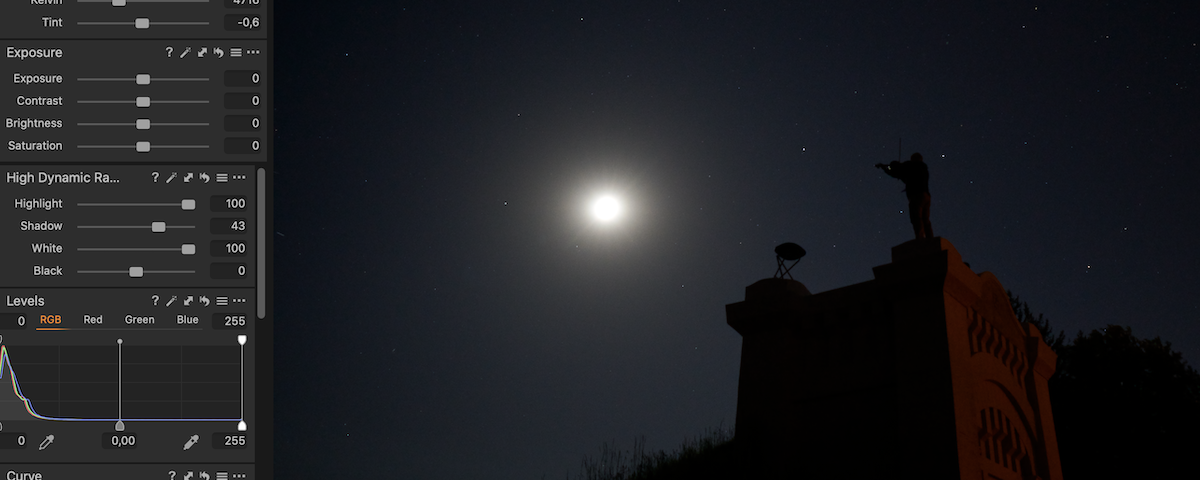
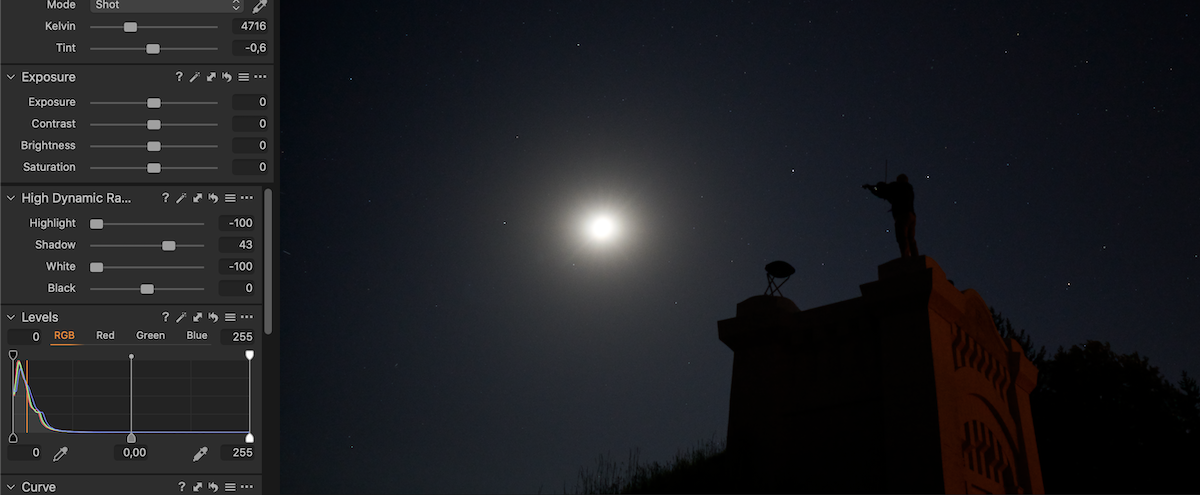
I basically agree with Ian, but that does not mean that the C1 version, on your system, with your camera raw files works flawlessly. I suggest you add one or a few color readouts from the toolbar on the moon, select also "show always", and move the slider(s) to see if and how the value changes.
Especially the white slider is very subtle, so set the exposure and the levels black snd white point to reasonable values to start with, which I believe is the case here by looking at the levels histogram.
0 -
"I suggest you add one or a few color readouts from the toolbar on the moon, select also "show always", and move the slider(s) to see if and how the value changes. "
Thank you for the suggestion - you mean the colour editor ?0 -

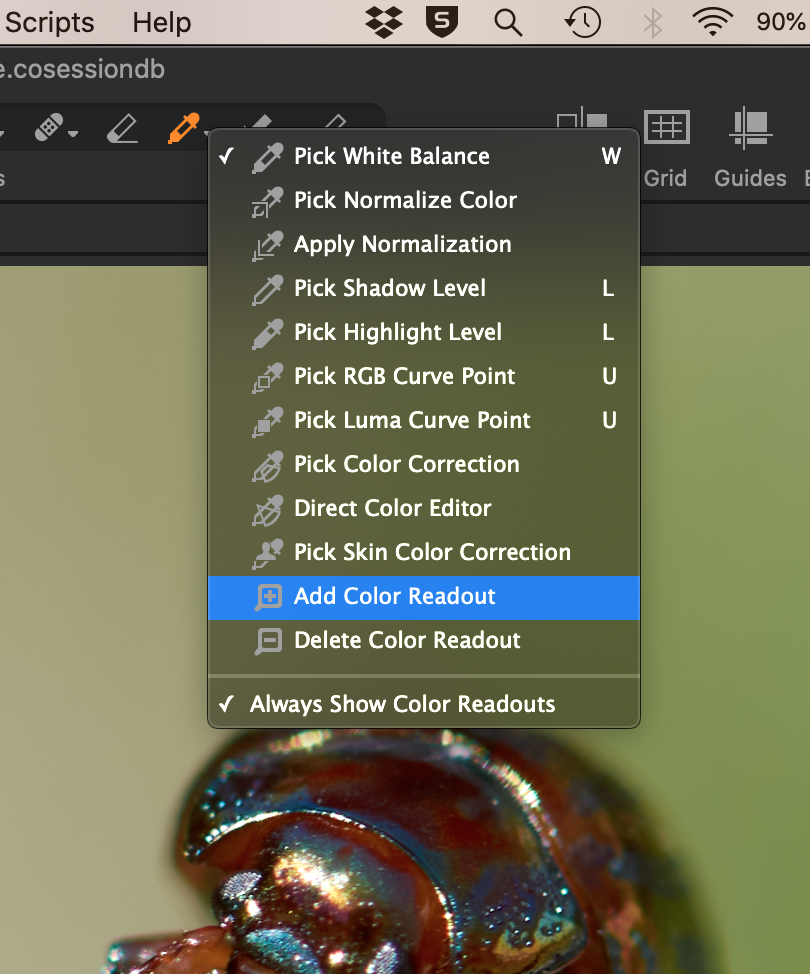
No, the colour readers can be found in the main toolbar. They give the R, G, B, L values (or L*a*b* values if preferred) for a given position, and you can access the effect of any adjustment on these values.
See image below to find them (in orange colour on the picture).
 0
0 -
Hmm, is there any tutorial about this tool (pick ... color readout etc.) ? I have not much idea about it ...
0 -
You click and hold the picker tool on the toolbar to be able to select the type of picker you want. Here is what it looks like with the appropriate option highlighted.
Then you click wherever you want in the image to add a colour readout. Here is an example with two added.
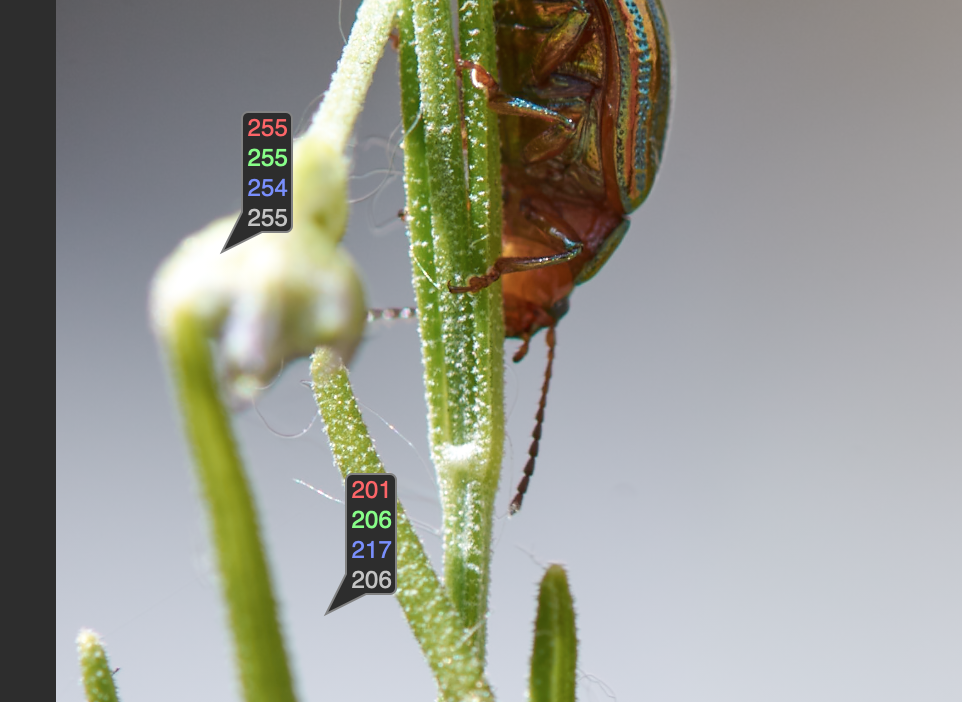
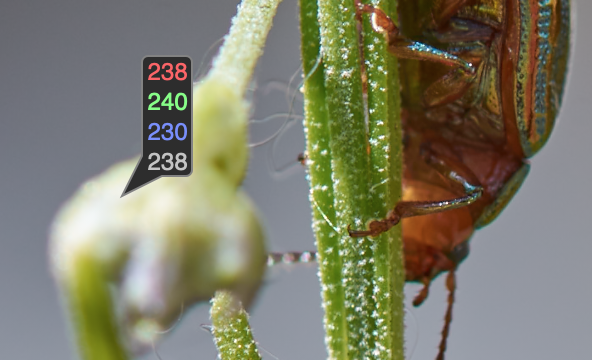
You'll see in this example that the upper one is pretty well maxed out at 255 (or 254 on the blue channel) whereas the other one is bright but well short of being blown out. The suggestion is to do that and add one of these readouts on the moon in your shot, then see how the values change as you adjust the highlights and whites sliders. Here is what I got with the same image, without moving the position of the upper readout, when I pulled the highlight slider right down to -100.
By the way: the easiest way to get rid of the readouts again is to hold down the Alt key and click it with the same tool. (When you hold down the Alt key you'll see the tool change to have a minus in it instead of a plus.)
Ian
0 -
Thank you ... so it means that these numbers are just informative and show if the values are moving ?
0 -
Yes, that's right. They are a way of getting a precise readout of Red, Green, Blue, and Greyscale values at any given point.
Ian
0 -
Robert and Ian, you explained it very well, as I should have done in the first place... :-)
thanks.
jj, if you put a couple of these "readouts" on the moon next to each other and they show 255,255,255,255 (which is pure white), and then use any slider affecting the bright parts of the image, white, hilights, exposure, levels etc, and you notice the readouts go lower to e.g. 244, 244,244,244 (which is a light grey), then you know you're not going to see the man in the moon with C1, whatever you do.
Now compare this with LR, you will probably also see some grey, even so the sliders have a higher effect, it will lead to a darker light grey but still the full moon is grey and no man in the moon either.
Then you know the moon is blown out, no details were recorded with your camera settings.
If you are interested, you could adjust the whites and export with LR, e.g. a tiff or jpg, import to C1 and look at the readouts there.
regards
0 -
For sure Lightroom has bigger range in highlight etc. See the normal photo with -100 highlight in C1 and LR (that sometimes can be missed)
 0
0 -

 0
0 -
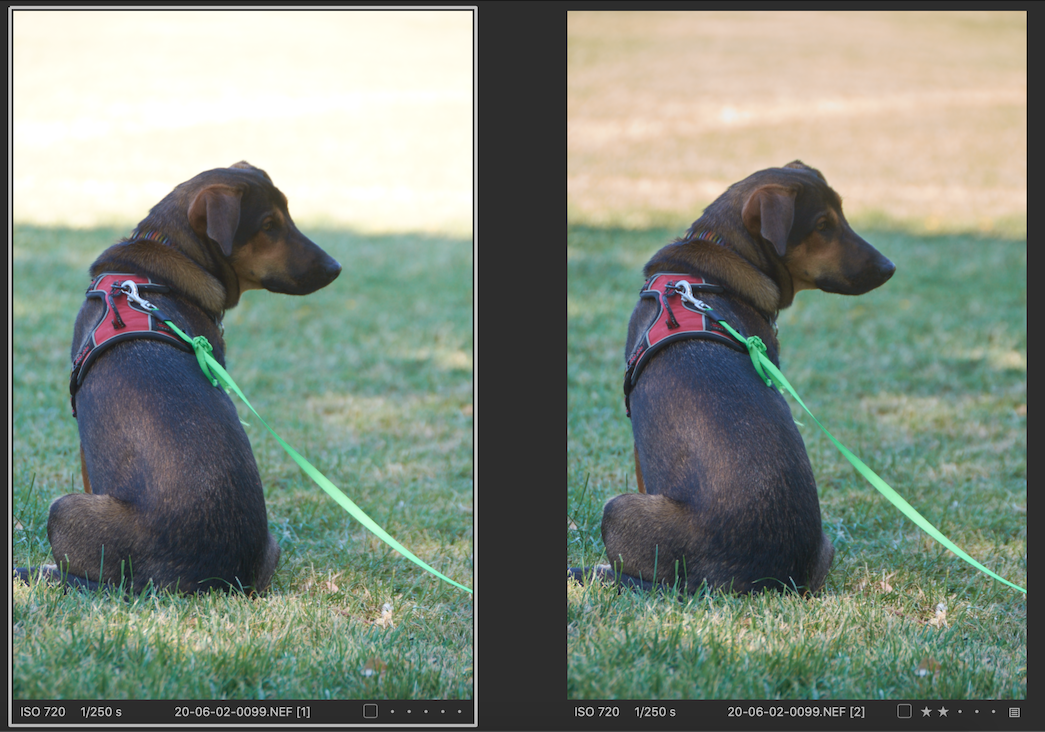
I'm no LR expert, but I really don't understand this. Here's a photo (nothing wonderful, but it has highlights problems so it serves to illustrate the point).
First two versions from Capture One, the variant on the left being straight out of camera, no adjustments at all, and for the variant n the right, all I have done is pull the highlights down to -100.
Then Lightroom, and again all I have done being to pull the highlights down to -100.
Capture One seems to me to have recovered more.
Or am I misunderstanding?
Ian
 0
0 -
IS,
The LR image has lower exposure overall, or more contrast, it differs mainly in the mid tones, not the highlights, see my illustration proof below.
Wether or not that is due to the highlight slider only I have some doubts, but even if the highlight slider influences more of the midtone range, this does not make it better, nor worse, just different.
There is no standard, let alone a gold standard, how exactly a highlight slider has to work (or any other slider), which part of the histogram it needs to affect, and how.
Rather the point is how much details it can recover (in case of the highlight slider).
The only thing that usually matters is how much details from very bright or overexposed areas can be brought back into the range of discernable colors/tints/tones. 200,200,200,200 is no better than 254,254,254,254, both is grey, not a color, and if adjacent pixel have the same value that means there is no detail in that area.
To illustrate this, I have imported the two jpegs into C1 and added color readouts.
1. Left hand side, the tree is blown out, both C1 and LR only can show a certain tone of grey. No "detail recovery" in the highlights with either application, just a different shade of grey.
2. The middle tree shows that C1 has higher values in the lower midtones than LR, fot this specific image and developement.
Nothing to do with highlights but proofs my first sentence that this image development has more contrast in LR. That's all.3. His neck. Upper midtones. Nothing to do with highlight or detail recovery either.
From this state of the image development, you can do further edits in both applications.
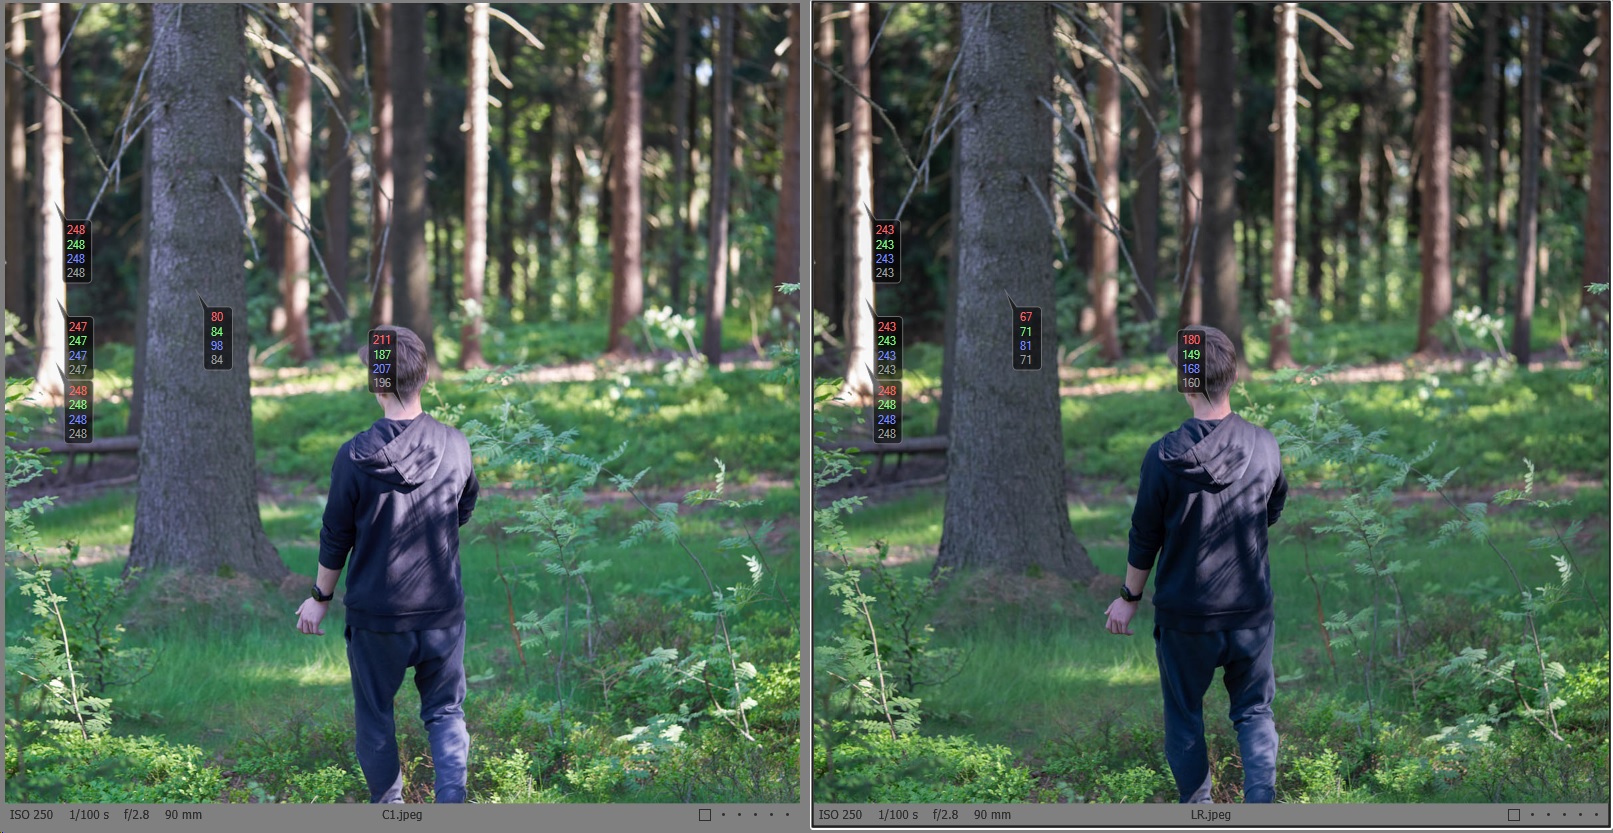
Bottom line,
is does not make sense to compare or glorify either "slider" in an application. The total end result matters, using the respective tools at hand.
Regarding highlight recovery I cannot draw a conclusion looking at this specific image. For me, this is not a good candidate.There are images with blown highlights neither C1 nor LR can bring back.
There are images with almost blown highlights both C1 and LR can bring back.
There are probably only a few images with highlights for which one but not the other application can bring them back. I don't care enough for LR to fiind those and conduct any further comparison tests, but would happily read thoroughly conducted tests if they were/are available.
regards
0 -
Sure ... I was just wondering if C1 does not have a bit limited some of these functions ...
0


投稿コメントは受け付けていません。
コメント
18件のコメント