How to apply "view selected color range" to the actual photograph?

So, I have a photograph, and once I check "view selected color range" I like the way it looks. The only problem being that it doesn't affect the photograph, it's jut a visual effect. I would like to have the ability to apply the same exact setting to the photograph itself. I like the way it makes the blacks deeper and eliminates any subtle colors, but it doesn't necessarily make the photograph black and white.
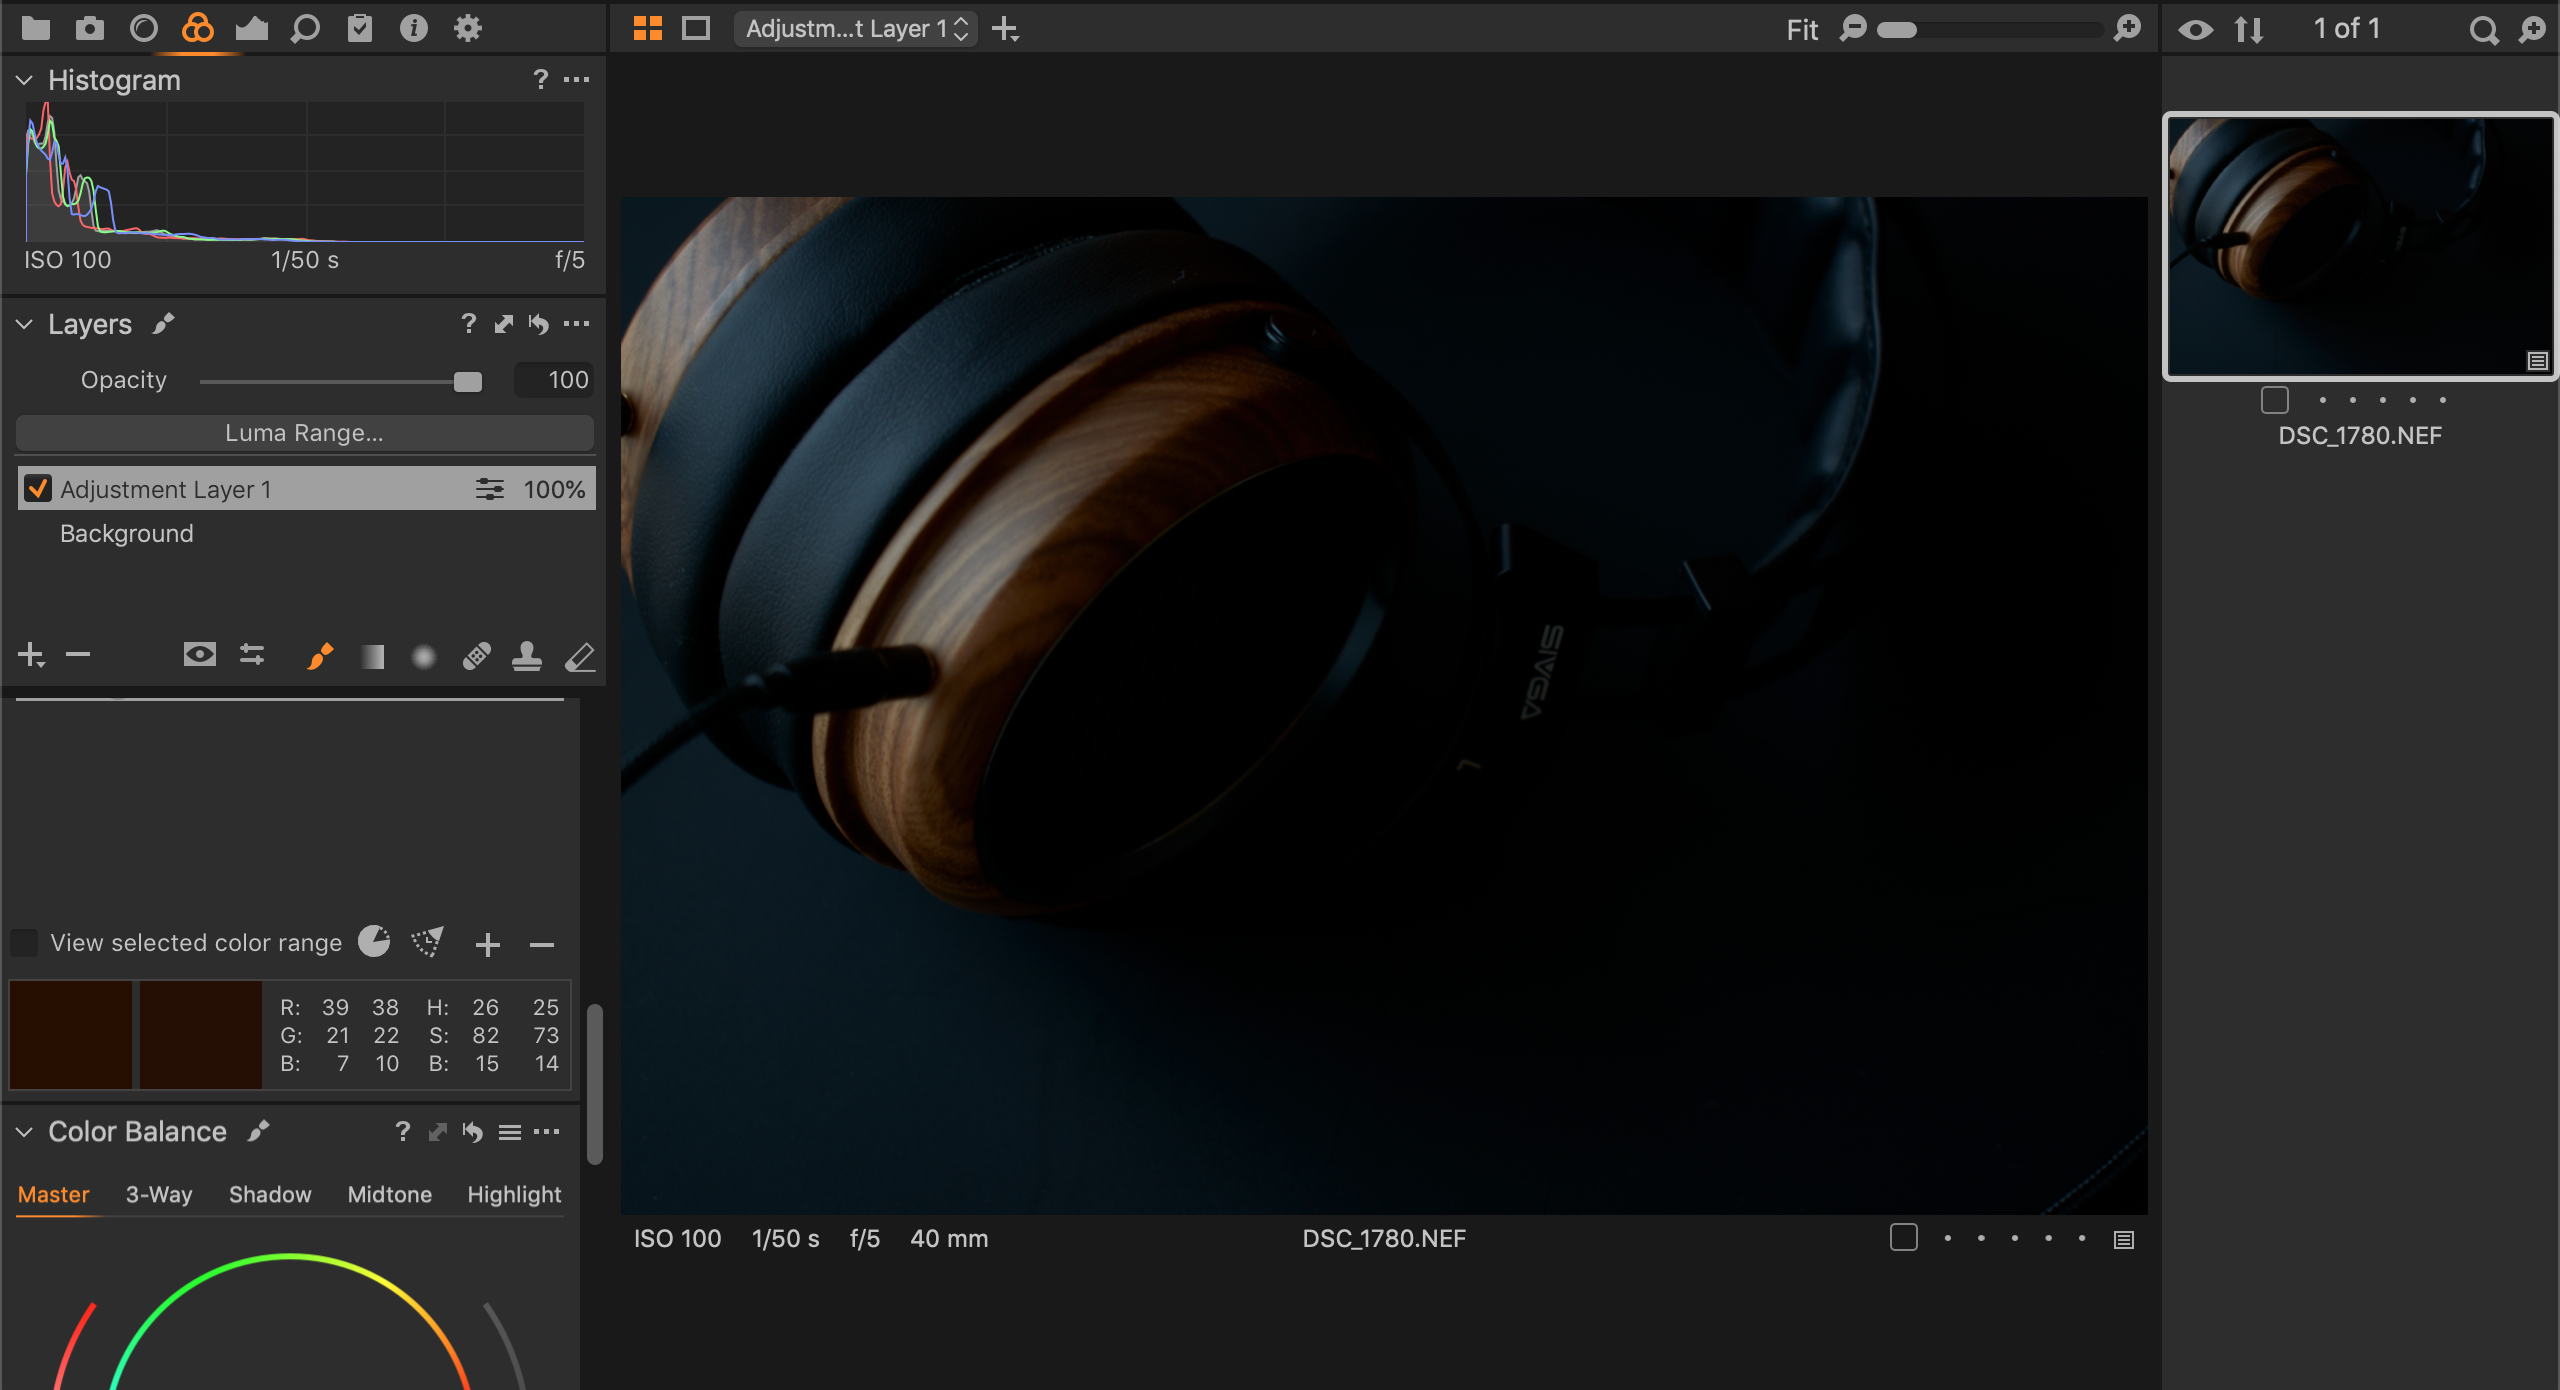
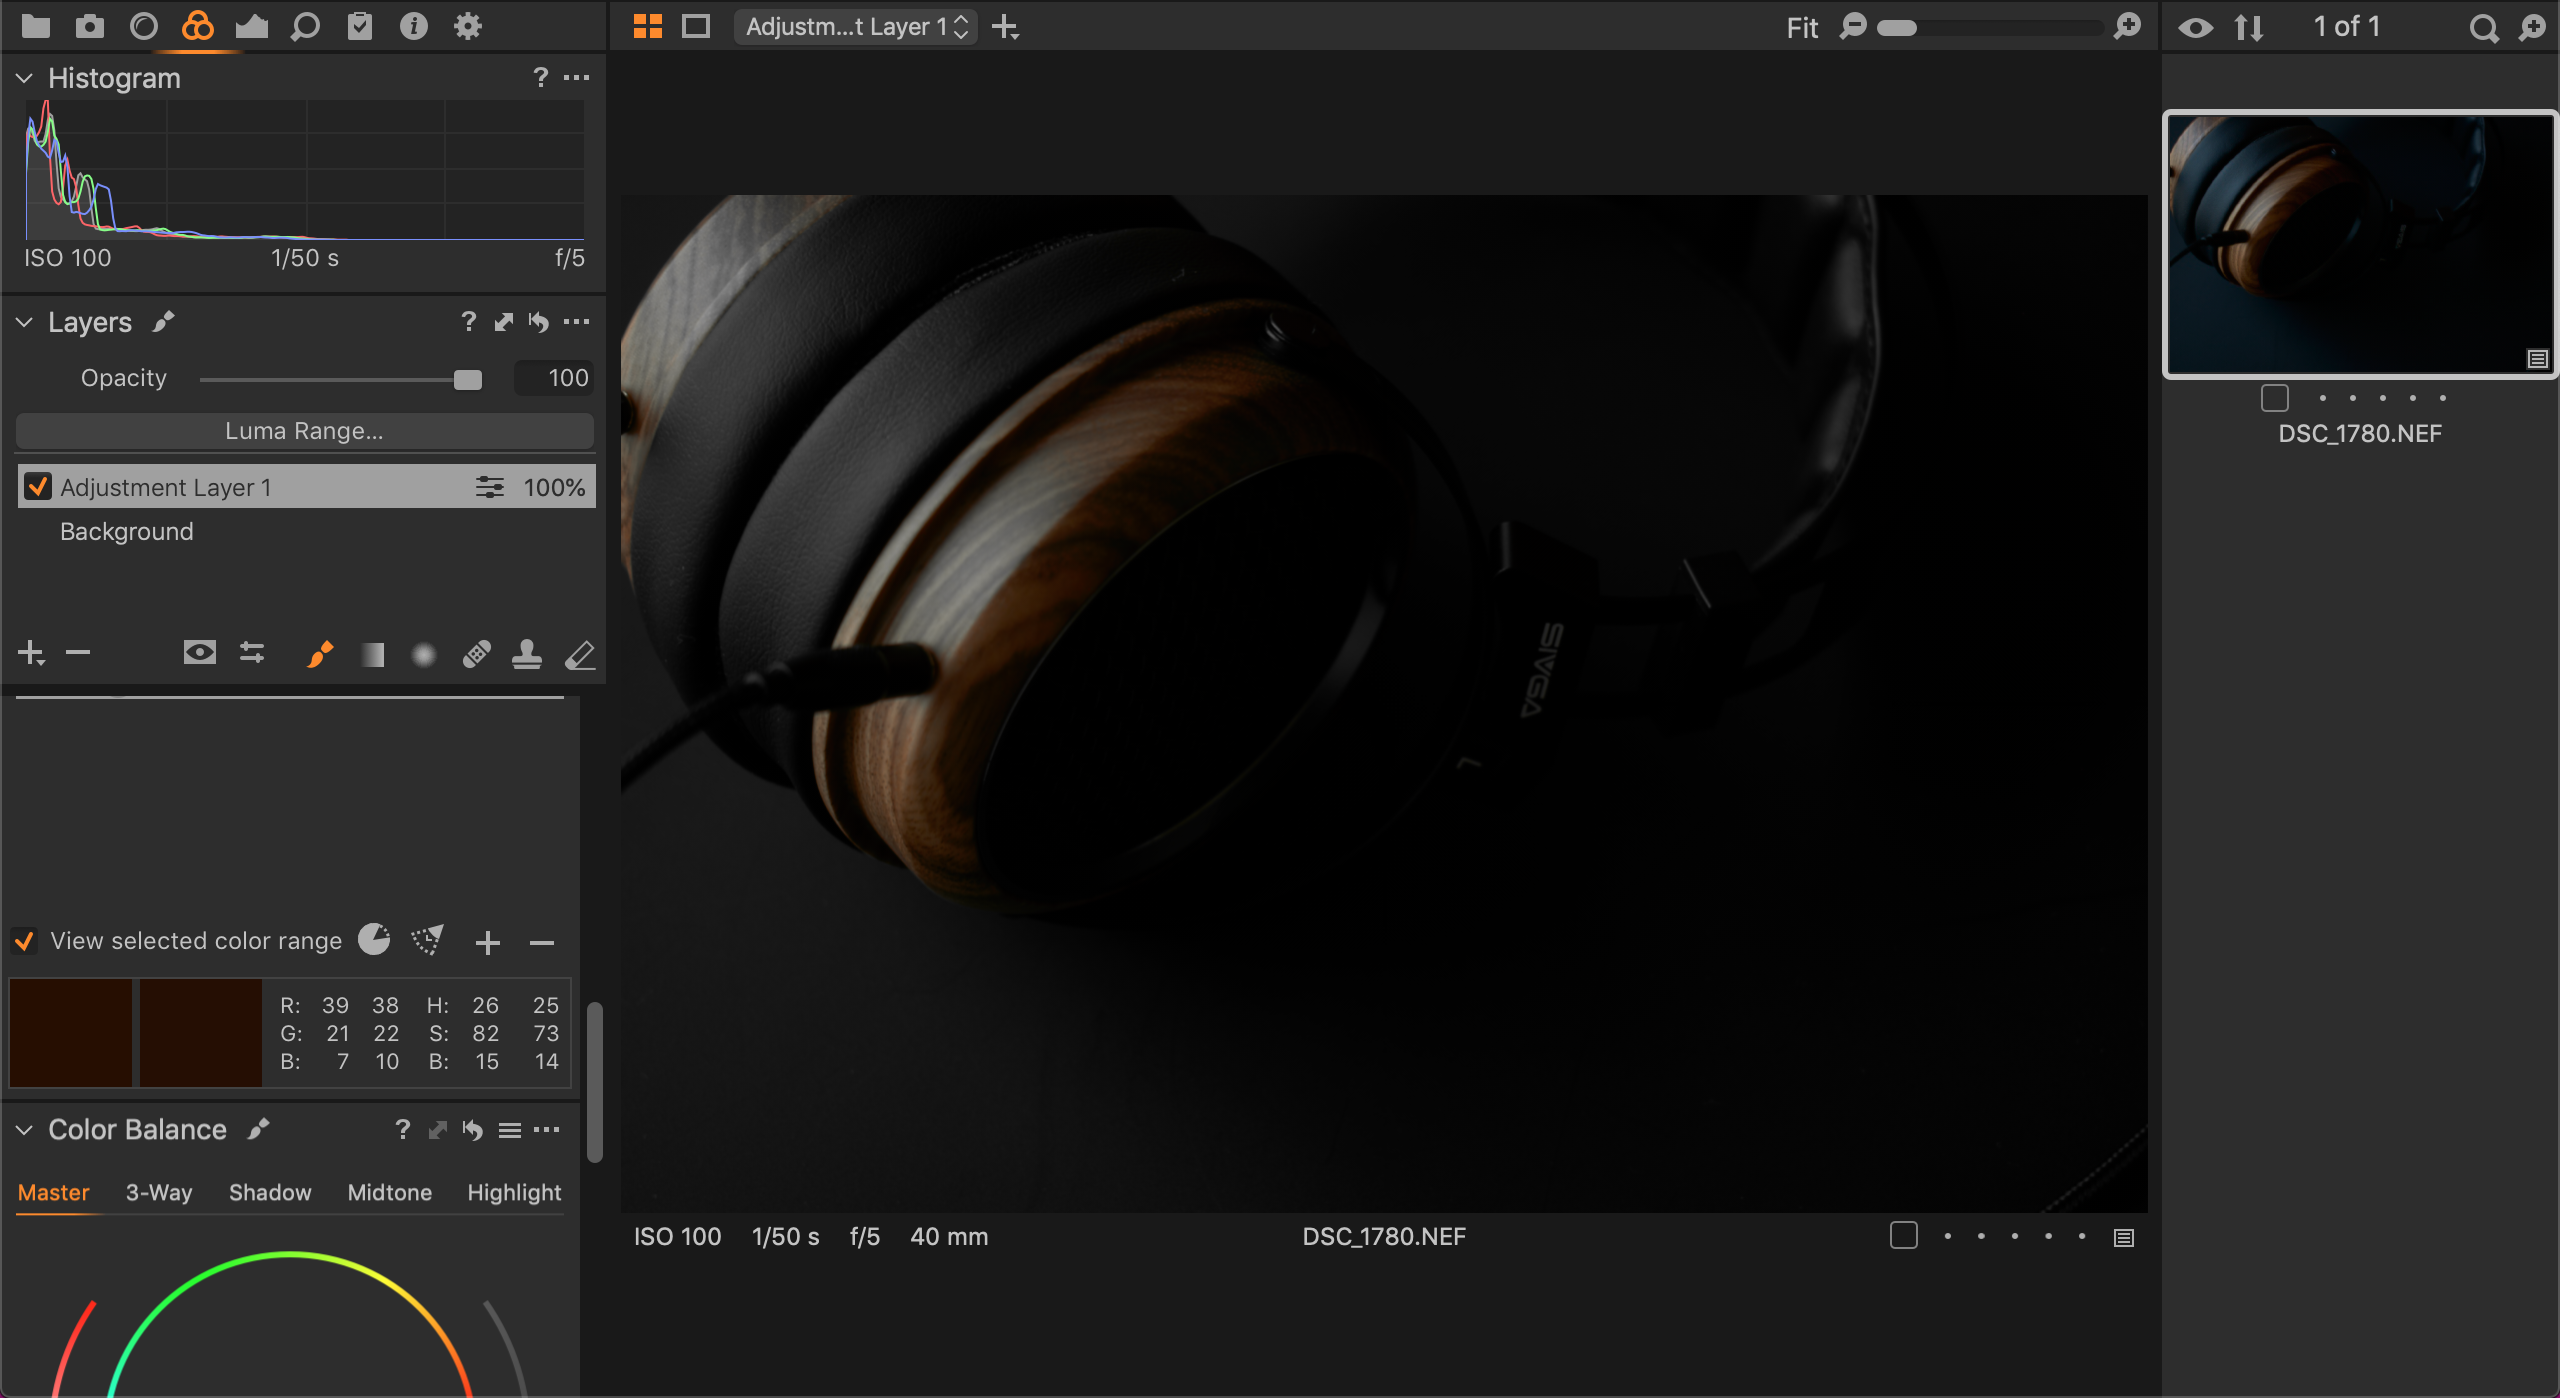
Here are the photos:
In the first one the "view selected color range" hasn't been selected.
In the second one it has. How can I actually achieve the effect from the second picture - I don't want it to be a preview, but rather the actual coloring of the photograph
-
View selected colour range leaves the selected colour range in colour, and turns the rest of the image to black and white. You can achieve that result if you
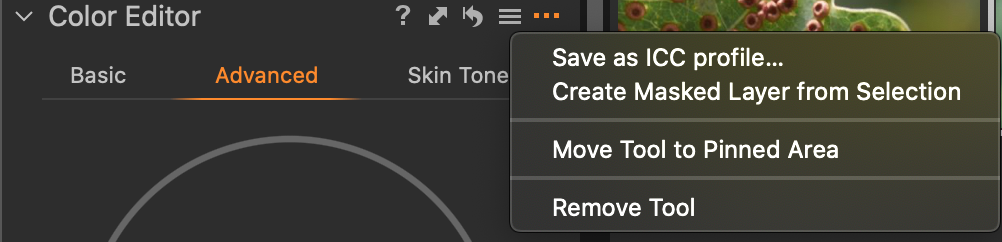
- Click on the ... in the colour editor tool and choose create masked layer from selection (see screenshot below)
- go to the layer that it creates, right click it and choose invert mask
- you now have a mask that corresponds to the areas that were black and white when you used View Selected Colour Range, so pull the saturation down on that layer and you have the result you wanted.
Ian
 1
1 -

@ voja cirjak
— "So, I have a photograph, and once I…"
Not really. So long ".NEF" is the extension, it is a data file and not
a photograph… just not yet.
A converter will read the data, screen a temporary preview, apply
the tweaks via sidecar files (because RAWs can't be altered!) and
then — as you publish your final version — the converter will render
a real image… in whichever format that suits you.
I just meant to be clear. 0
0 -
@Ian Wilson
That did the trick. Now, I only have to get the correct tone of the wood...
Thank you!
0

投稿コメントは受け付けていません。
コメント
3件のコメント