Change all RAW images to greyscale

How can I change all my images to greyscale with a single action?
I typically shoot b/w on my Sony A7iii by setting creative style to mononchrome and the quality to RAW. But when I import the images to Capture One they are displayed in color. I can change them to greyscale individually using the "Enable Black and White" panel, but I have not figured out how a simple way the images in a shoot (often several hundred) at the same time. Does anyone know how to do this?
I have tried converting one image to b/w, then copying the adjustment, highlighting all the images (using CMD-A), and applying the adjustment – but this does not work.
-
This works for me:
- Select all images,
- make the image which you have already set to b/w your primary variant by clicking on it
- then hold the shift key and click on the arrow icon:
 0
0 -

I have tried converting one image to b/w, then copying the adjustment, highlighting all the images (using CMD-A), and applying the adjustment – but this does not work.
Did you open the Adjustments Clipboard and make sure that the Black and White/Enabled field is checked as something that can be copied? If not checked it will be ignored.
I think you can also make a B&W preset that could be applied to every file on import to simplify things in the future.
Or do what BeO suggested. I often forget about that option.
0 -
Hi Marco:
Many thanks for those suggestions. As a test I checked the Black and White/Enabled field in the Adjustments clipboard, converted an image to b/w, copied the ajustmentment, highlighted the next two images, and applied the adjustment – but only the first of those two images was converted. I guess this raises the larger question of how to apply any adjustment to more than one image. If someone has an answer to that, I'd love to hear it.
I haven't tried making a preset and don't know how, so if you can tell or send me a link with instructions I'd be very grateful.
I don't know who BeO is, so please let me know, along with how to find whatever their suggestion is.
Thanks again.
0 -
Sorry, just saw BeO's comment. I'll try that.
0 -
Hi BeO: It works!!!! Thanks so much.
0 -
Select an image. Open the color tab and disclose the Black & White tool. Click on the Enable Black & White. That is what you have been doing.
Now click on the "hamburger" icon to the left of the ... in the B&W tool. The bottom of the resulting pop-up is "Save Custom Preset". Click on it and then click on Save. Give the preset a name, maybe "b&w". Save it. You've just created a preset.
When you import open the adjustments panel and pick the preset you just saved. Like this:
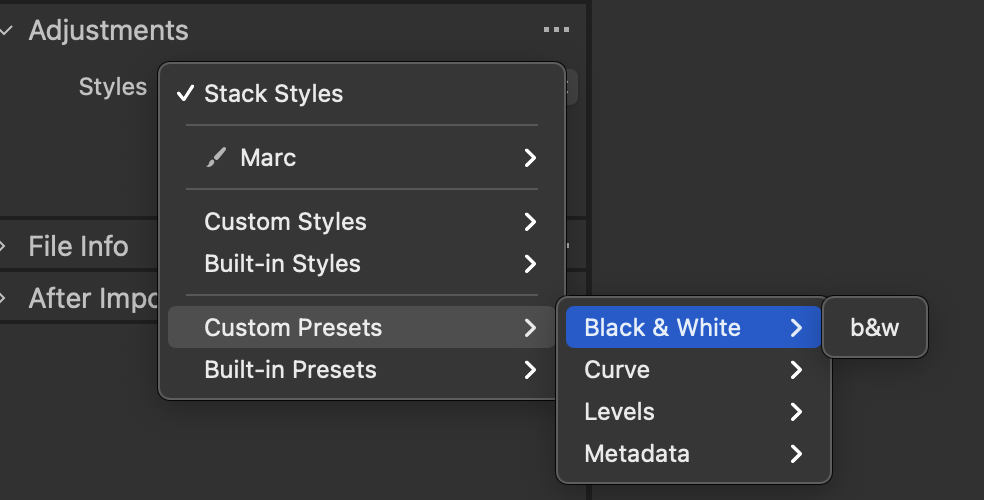
pick b&w. It will be applied to all imported images.
0 -
Many thanks. Marco. I'll try it.
0

投稿コメントは受け付けていません。
コメント
7件のコメント