The Copy Stand tool can be used to automatically move the camera cart on a supported copy stand until a chosen target resolution is obtained. This feature is only supported on Phase One or DT branded AutoColumn stands.
The Copy Stand tool is supported on the Mac version of Capture One CH starting from 12.1 release and on the Windows version of Capture One CH starting from 20.0 release.
Using AutoPPI with Copy Stand
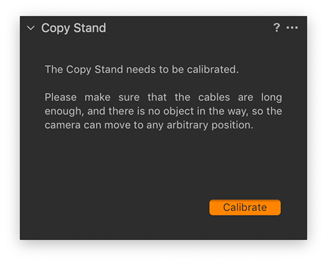
1. Connect a supported copy stand to your computer and then start Capture One Cultural Heritage. The Copy Stand tool needs to be calibrated and configured manually first, so the Copy Stand tool will now inform you that the stand needs to be calibrated. Click on Calibrate and the camera cart on the column will move.

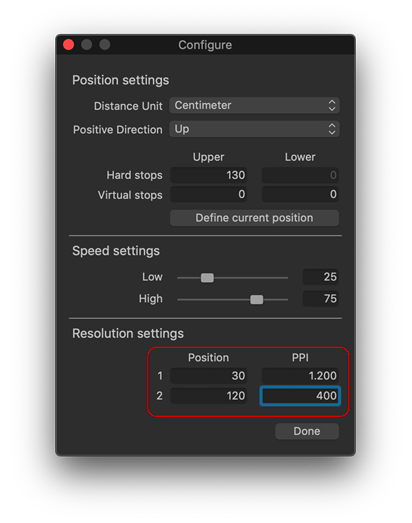
2. You start by setting the hard safety stops by clicking on the options icon and choose Configure…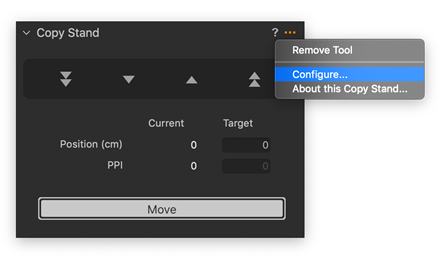
Set the Distance Unit to Centimeter and Positive Direction to Up. This matches the physical markings on the column (which are in centimeters) and increases as the camera is moved upwards.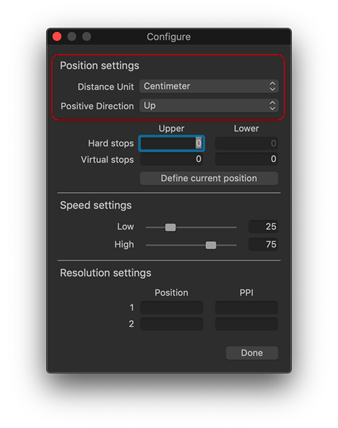
Consider the height position of the camera carriage. This value is read where the bottom of the carriage aligns against the copy stand ruler. Click on Define Current Position, enter the carriage height, then click Set. Click Done.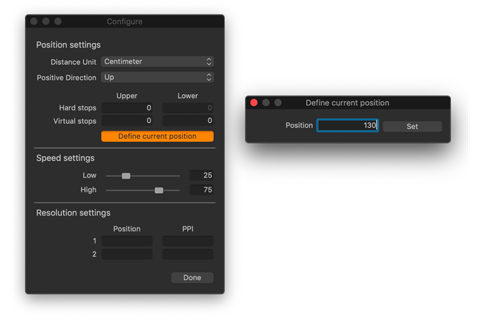

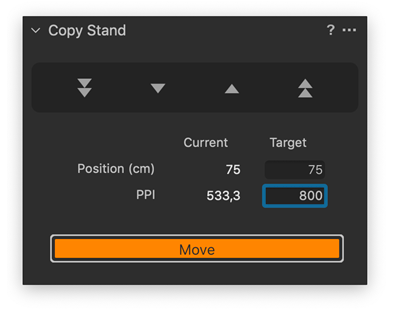
3. Once this calibration is complete, you can move the camera height on the copy stand manually by clicking on the arrows in the Copy Stand tool.


4. If you want to take advantage of the Auto PPI feature, the tool needs to be configured first. This is done by taking two captures with the camera placed in two different height positions on the copy stand. You will need to capture a subject with clear distance measurement, like a ruler.
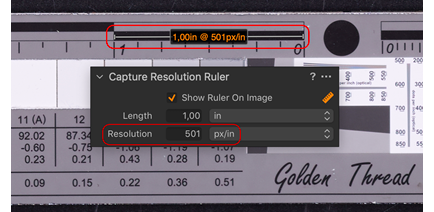
Select and use the Capture Resolution Ruler tool to measure the pixel per inch value for each height position and note the height information on the stand and the resolution for both positions. The height position is read where the bottom of the carriage aligns with the copy stand ruler.

5. Once done, click on the options icon and choose Configure...
6. Under the Resolution settings, enter the height Position and the corresponding PPI for both positions noted in step 4. Then click Done.

7. Enter the desired Target PPI value and click on Move. The copy stand will now move the camera cart on the column until the target resolution is reached. Focus the camera and begin the captures.
NOTE: The Copy Stand tool will reach the target PPI by interpolating between the two entered Position/PPI settings. This is done quite accurately. The tool can also extrapolate outside of the two measured height positions, but it will be less precise.
Comments
0 comments
Please sign in to leave a comment.