Help please for new user with fixing tiny blemishes

I'm new to C1v21, from LR. I have a project re-filming old 1930s B&W prints to make digital copies for family round the world. IK used a 100mm Canon L series. I just wonder if there is a quick way to select all the white 'spots' in my RAW image, where the original print had been worn through to the white 'underpaper'. Having seen some tutorials on being able to select tiny sections of an image with masks, possibly Luma, I thought it might be possible to replace these damaged portions by darkening the blemishes. It doesn't have to be perfect, but any thoughts on what might help would be much appreciated.
-

Steve,
Tricky if the white spots appear in areas of the image with completely different surrounding shades of grey. That would probably be a job for the spot tool or the heal tool - but either would not be a quick solution for multiple images in your use case.
My initial reaction would be to play with the Luma range as you suggest to select the offending areas and then try inverting the settings for one or both of the Levels and Curve tools. See what you get and whether intermediate adjustment levels are required.
You might find you need multiple layers to apply adjustments to "bands" of greyscale from black to near white.
There is, therefore, some danger that a single mask based on a luma range suing only white spots (or very close to white spots) would simply not work to obtain an acceptable match across multiple areas of an image.
Much would depend on your acceptance level related to "it does not have to be perfect"!
This is the sort of area where scanner software might have some advantage. There might be alternative, perhaps AI based, applications available that offer the facilities you seek. It's not an area I have been involved with for a few years.
But in C1, if the Spot tool is not useful and healing layers would be too laborious, there are no obvious options I can think of that would provide a labour light workflow.
Others may have different suggestions.
0 -

First I would think "how bad are the white spots - they are genuine marks of age". By repairing the scratches, you're adding new information, not necessarily true or better than the "not repaired" digitalisation.
Second, a Luma mask is only a selection, in other words a separation of the damaged parts to the not or less damaged parts. C1 would not use it for a general automatic repair action, you'd need to do it manually.
I would skip the masking and use the spot repair brush. If the scratches are longer, the new repair brush (which sometimes has "interesting" [/sarcasm] ideas of where to get the source information from) could also help. Else, I agree on most of what SFA already mentioned. Scanner software might get better results if the white spots are particles like dust, some scanners then do an infrared scan and use the mapped particles to mask and repair film scan - but I understood you were digitizing prints? I'm not certain if that kind of dust removal routine would work.
DxO does a fairly good job with repairing blemishes. For more than 4 or 5 prints I would not use C1, but prefer Affinity Photo, DxO or Photoshop and use PNG format which is a bit more compact than TIF or PSD
0 -
Hard to say without a good example image.
If your images also contain desired white areas then you have to work manually anyway, e.g. roughly masking the undesired spots or mask the layer completely and delete the mask over the desired areas and then use Luma Range.
Darkening the white spots in C1 means you'd exchange one grey (white) with a another grey, I have some doubts that this would improve the images. PS, Affinity or alike might give you better options, maybe you can create a layer beneath the image and blurr a copy of the image in that layer and you might be getting a localized grey which fits better to the surrounding image part of the spot.
If it is tiny spots, you might consider leaving them as they are, it might even underline the vintage character. Then it is also not perfect but at least genuinely old.
0 -
And yes I agree with Joachim, the healing brush is a lot of work but works quite good, similar to Affinity et.al.
0 -
Hi SFA, and thank you.
Very useful suggestions. I want to try a few of your, and now others', suggestions as a means of learning how to use C1. Any improvement will be good, and it isn't for clients, just family, so pressure for perfection is only my problem.
I don't have a scanner and purposely chose not to go down that route. Having a specific issue to address does focus the mind and it will be useful to play with all the suggestions. Multiple layers is something I hadn't thought of.
Thanks again.
0 -
Hi Joachim Jundt, and thank you too.
There are many marks of varied sort. There were no dust issues, just surface damage. The ones I've discussed are really where abrasion has damaged the surface of the print and taken the 'photographic' info/image away totally, even if in tiny spots. I'm wasn't sure that 'healing' would be able to overwrite where there might be no data? I'll try and see.
I will be re-printing some of the images but also make=ing extra digitasl copies for online distribution to family in far away places. Many want to see these images for the first time.
If my attempts don't work any better it doesn't matter, except to me.
As I said to SFA any advice or discussion is very helpful as I start to make the transfer to C!. Thank you again.
0 -
Hello BeO, and thank you for responding.
I expect I will be doing a lot of manual adjustment. I was just wondering if there would be techniques to speed up the process.
The blurring suggestion on a separate layer is an option to consider which I'll test. I definitely agree with your last sentence. Leaving them as they are is fine, as that is the 'actualité'. My
I want to learn as much as possible and having questions is a good way to explore other options, which may be more useful in later scenarios. Thank you also for the extra tip re the healing brush. I've not used Photoshop or other suggested software, and can't afford another learning curve let alone the price!
Thank you again for helping me on that 'road'.
0 -
Steve,
You are brave taking on the task if you have a large number of prints to process!
If it was my task I think I would just do the least amount of work to make them presentable in most cases.
If any images stand out as significant for one or more of the recipients and look somewhat reasonable to tweak, then do something special with them. But not all of them. Save your sanity!
So long as people on the distribution list understand your approach I would not expect a poor reaction. You might also offer them a set of images that you think could be worth spending time with in order to "polish" the presentation and then see what level of encouragement you get for undertaking some extra work with those!
0 -
Steve,
You're welcome. Affinity Photo is quite affordable, and GIMP is free (I don't like GIMP too much on Windows but you have a Mac). But yes, learning curve is another thing...
If you have time then you might want to start with easier images in C1, and do your family project / the hard stuff later...
Have fun
BeO0 -
I'm wasn't sure that 'healing' would be able to overwrite where there might be no data? I'll try and see.
The healing brush uses data from elsewhere in the image to remove the blemish. I've been digitizing old prints and negatives. That means I've spent many, many hours using the healing brush as especially the negatives were in sad shape having been thrown in a box decades ago. Here are some things I've found useful to get the best results.
- Clean your work area with a damp cloth before digitizing. That helps keep dust down.
- I've found a spray of 99% Isopropyl Alcohol and a wipe with a ling free cloth helps remove mold/mildew spots from negatives.
- In Capture One after global corrections I zoom in at the 200% level and start using the healing brush.
- I've found the brush is easier to use if the circles and arrows are turned off. But sometimes you need to turn them on to change the source for a better repair. I assigned a keystroke (the \ key) to this function to easily toggle this function (Layer -> Display Heal And Clone Arrows)
- Sometimes Capture One will pick a source that is outside of the current crop frame. When that happens and I want to adjust the source location I'll undo the change and use option-click to select a specific source.
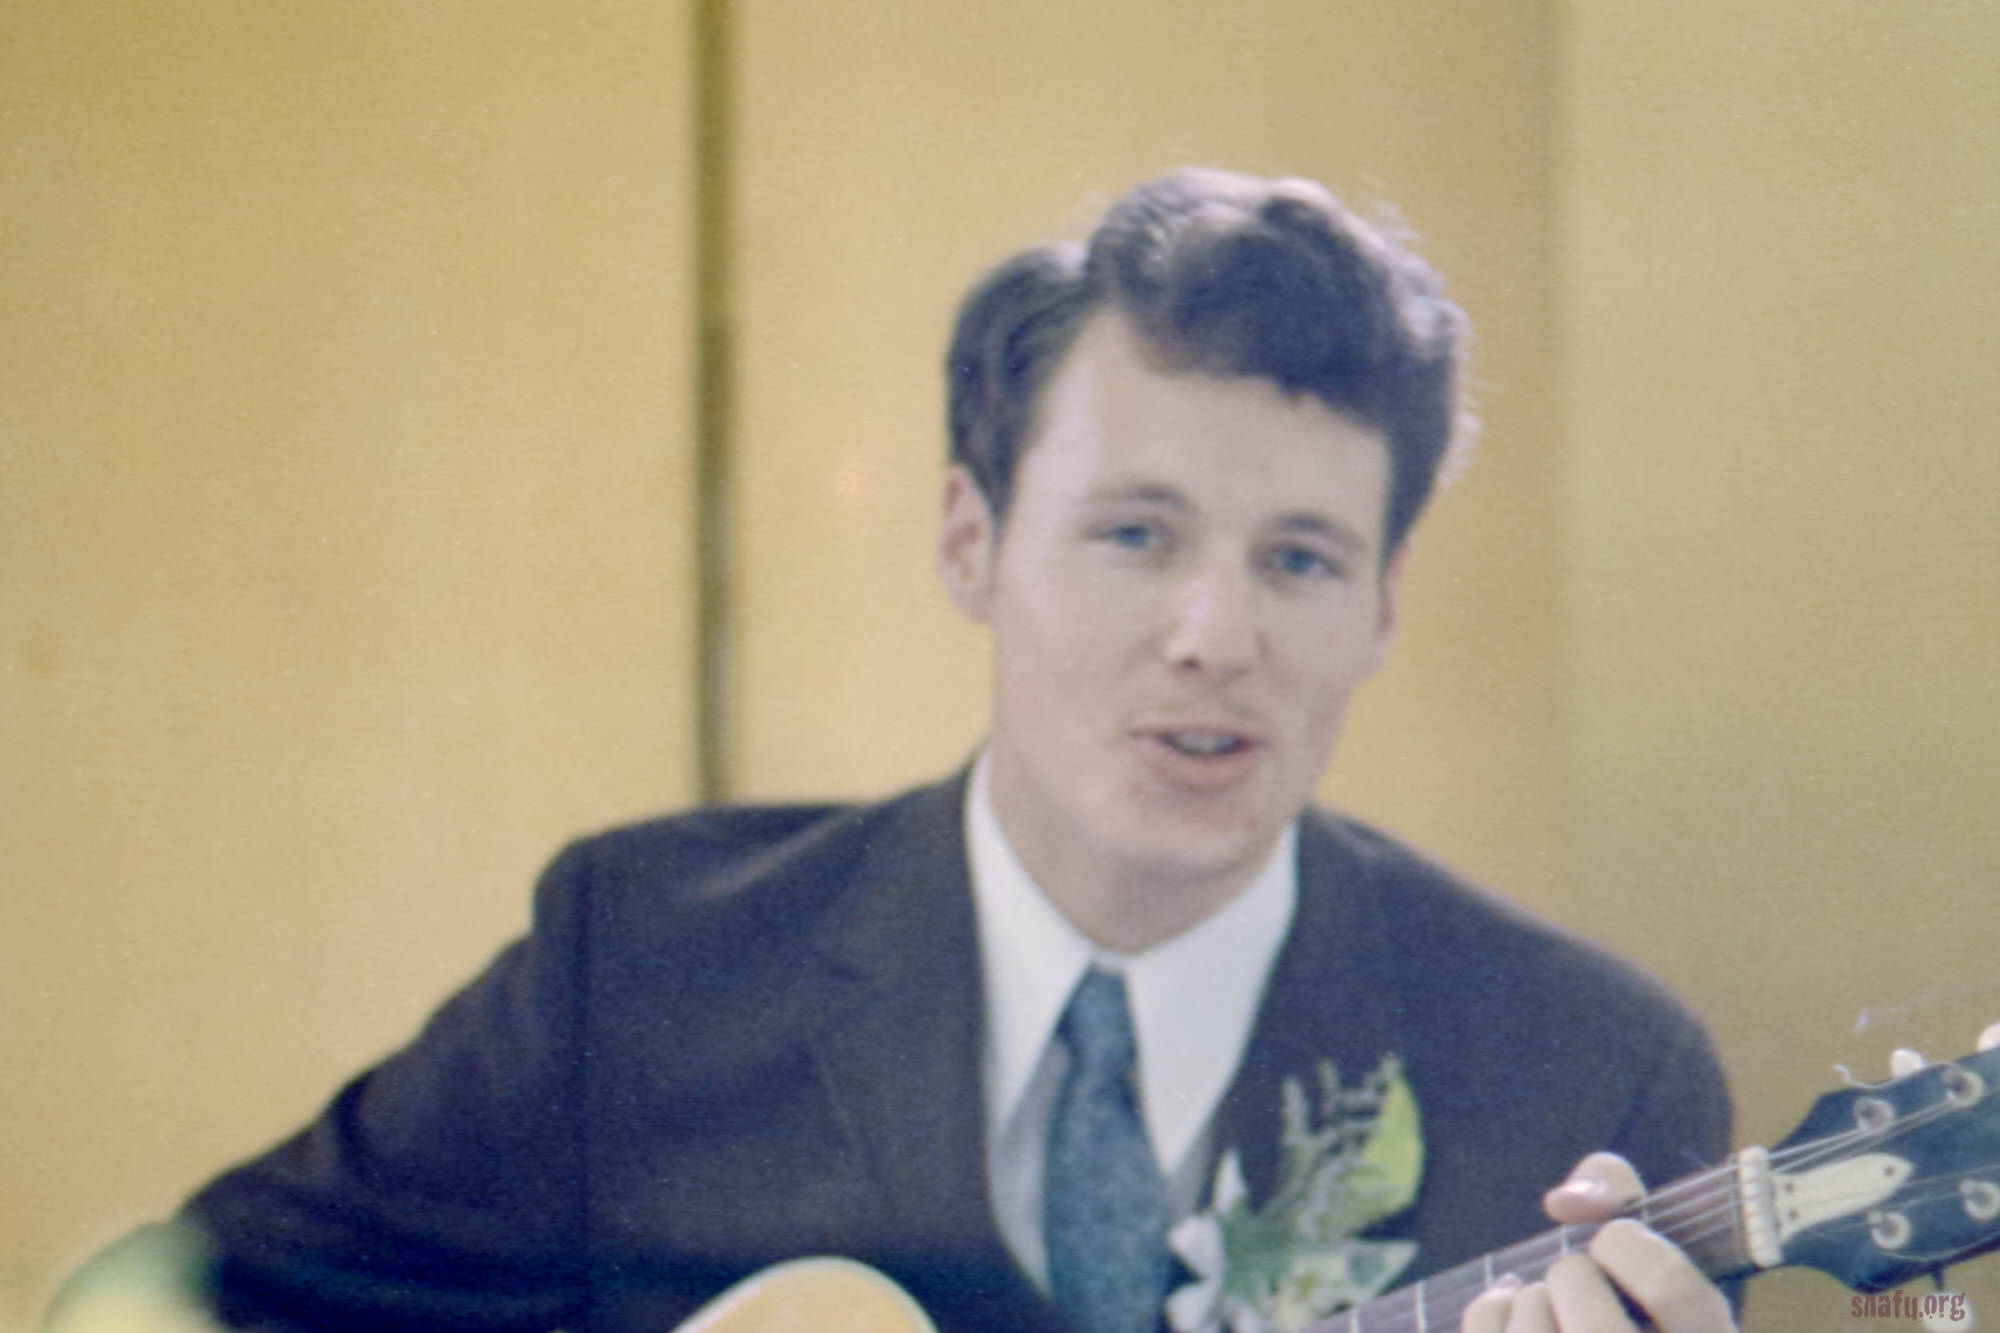
Here is an example of what can be done. This is a crop of a scan of a not quite in focus negative from 1972 that didn't need much in the way of healing. Many of the images had 100 times the number of blemishes seen here.
Before:

After:
 0
0

Post is closed for comments.
Comments
10 comments