Issue with exporting??

Is there a reason why settings are off when exporting as TIFF file?
For example:
- the Exposure adjustment in Capture One is +1.34, but when opening in Camera Raw right after export is shows +1.78
- the Contrast in Capture One is +2, but when opening in Camera Raw right after export it shows +19
etc etc etc (many other settings are different than they show in Capture One).
What is the issue? I am using Capture One 22 Pro build 15.4.0.16 on Windows 10 Pro
-
I have just checked this - I have an image that in Capture One has +0.45 exposure and +11 contrast. If I export it as a TIFF and open it in Camera Raw in Photoshop, it shows Exposure as 0 and Contrast as 0, which is what I would expect as it opens it and can adjust it from the baseline that was baked into the TIFF when I exported it.
So am not sure what procedure you are following.
But in any case I wouldn't expect all the settings to be the same in another app.
Exposure is a definite scale - so + 1 means twice as much light, and +1 in one app ought to mean the same thing as +1 in another. But contrast is not a definite scale, so + 2 in Capture One just means that it is +2 on Capture One's scale of up to 50. Other software has a different contrast scale. In camera raw it goes from -100 to +100, whereas in Capture One it goes from -50 to +50. But that doesn't mean that +50 in Capture One is equivalent to +50 or to +100 in Camera Raw. And in the Develop persona in Affinity Photo (the equivalent of Camera Raw in Photoshop) the contrast scale goes up to 50%. (But I have to wonder per cent of what?)
Ian
0 -
Ian, I am confused. You added +0.45 exposure in Capture One, but it opens with 0 exposure in Camera Raw in Photoshop, and you're ok with that? So what is the point of doing adjustments in Capture One and then exporting for further retouching in Photoshop, if it doesn't hold any of the adjustments?
My issue is that no matter what adjustments I make in Capture One, it exports to Camera Raw with +1.78 Exposure. Whether in Capture One it says 0, or +1.34, +1.2...it keeps opening in Camera Raw with +1.78
0 -
Well when I create my TIFF file, to take into Photoshop, it creates an image that in my case is 0.45 EV brighter than the original raw file was. But the TIFF doesn't keep a record of what the file looked like before I adjusted it in Capture One. As far as Camera Raw/Photoshop is concerned, the TIFF is the starting point. (And it will reflect all the work I did in Capture One.) If I had underexposed the photo when I took it, I might have had to increase the exposure in Capture One by 1.45 instead of by 0.45. But as far as Camera Raw/Photoshop is concerned the TIFF file it would see would be the exactly the same.
I wondered a few things.
- Why are you opening it in Camera Raw anyway? You presumably won't do any retouching in ACR, just in Photoshop proper. You can set Photoshop so that it doesn't open TIFFs (and JPGs) in Camera Raw.
- How are you taking the image to Photoshop from Capture One? Are you using Edit WIth (not Open With) and then choosing Photoshop?
- Never mind what the sliders say - does the file look the wrong brightness when you get it into Photoshop?
Ian
0 -
Ian, I tried taking the image into Photoshop in three different ways:
1. Image - Edit With
2. Image - Open With
3. Export tab - TIFF Adobe RGB (1998) recipe
All give me the same issues. Even the crop is not transferred over, it is so strange!!
And yes, never mind the sliders; the file looks the totally wrong brightness when I get it into Photoshop
0 -
Ian, I just realized one more thing: In the Capture One "Export Format & Size", if I change the format to PSD, everything looks fine. But if it's TIFF, then all the whacky stuff happens. So what is the cause of something like that??
0 -
Methods 1 and 3 should do the same thing - either way you get a TIFF that should incorporate your Capture One work. Method 1 should just be a quicker way of achieving the same thing as Method 3.
Method 2 is a different thing entirely. If you have your raw file and use Open With it will open the unadjusted raw file in ACR.
As far as the crop is concerned - when you choose Edify with and select Photoshop, you should get a lialoig box like this.
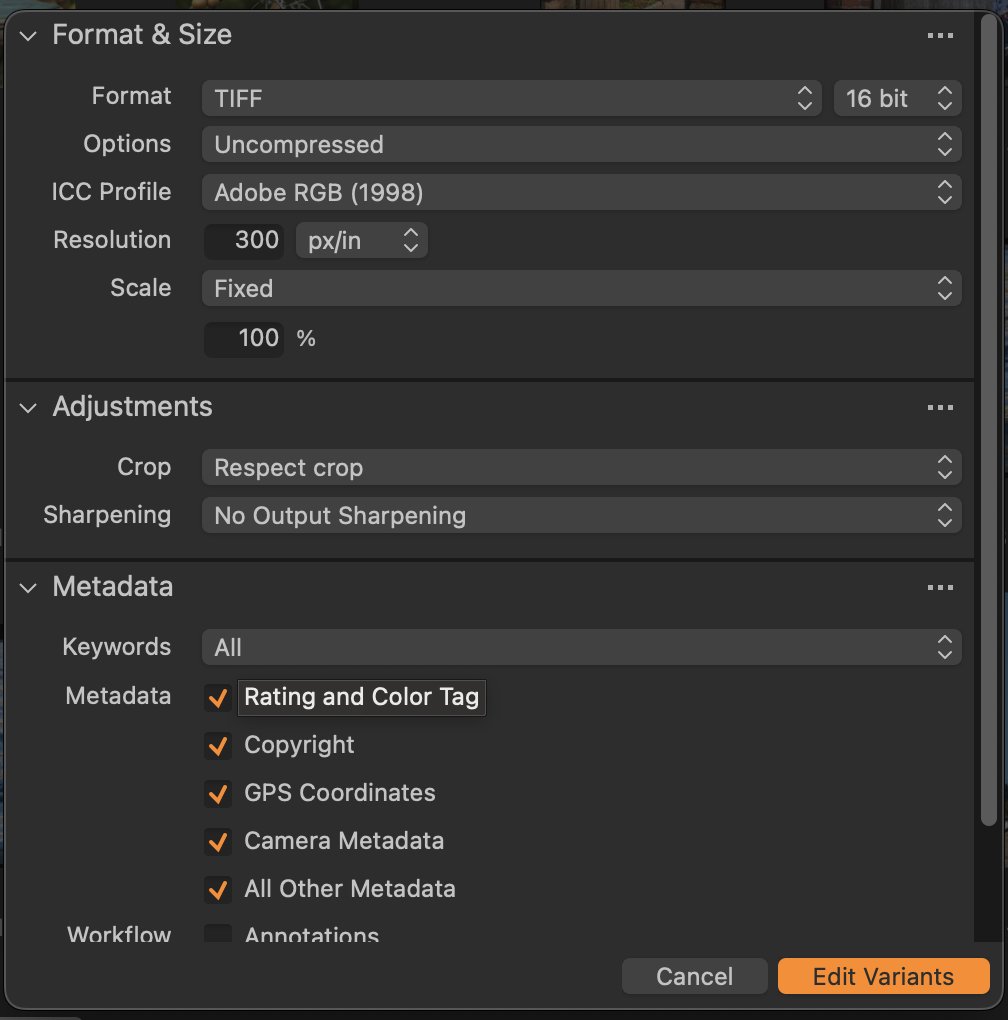
There is a section half way down where you can elect whether or not to have the crop included.
Can you eliminate the possibility that it is something wrong in Photoshop? If you look at the TIFF with some other app (such as Windows Photo Viewer or whatever it is called) is the exposure all wrong?
Ian
0 -
And what if you change some of the options for exporting as a TIFF, such as 8 or 16 bit, sRGB instead of Adobe RGB?
Ian
0 -
I do have the "respect crop" option selected. You might be on to something though: when I open the TIFF in Windows Photo Viewer, it looks like it's ok. So what could happen between the Capture One -> Photoshop transfer that is screwing this up?
0 -
Some setting in Photoshop?
Ian
0

Post is closed for comments.
Comments
9 comments