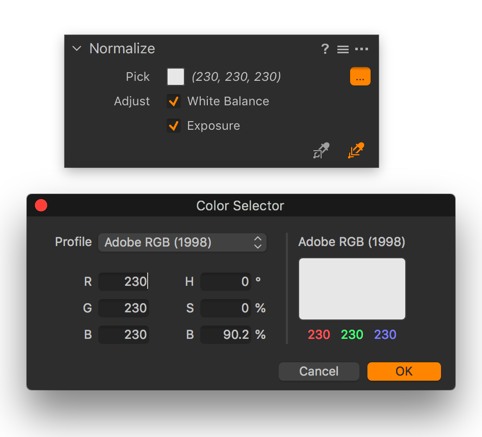
The Normalize tool has a custom color picker dialog that enables the user to add custom RGB/HSB values for selected color space. This is useful when you are working in a specific color space and want to apply certain values to the image using a different space or even fine-tune them in the same color space.
For example, if you are working on an image with consistent lighting between captures in Adobe RGB and want to apply specific color values to a white area to neutralize the highlights, you can specify 230, 230, 230, for instance, and apply those values directly.
- Open the Color tool tab and go to the Normalize tool.
- Click on the color patch or Action menu, the (...) icon, that is adjacent to the Pick field. The Color Selector dialog opens.

- Click on the Profile field and select a profile from the list. Adobe RGB and sRGB are the defaults, however, you can select from any of the profiles on your system. If not listed, select Show All to display the system profiles.
- In the RGB or HSB fields, add the relevant color value numbers.
- Click on OK to select and update the color values.
- Click on the Apply Normalization eyedropper or toggle between the pickers using (Alt+N) and click on the area in the image to apply the correction to (e.g., the white patch in the reference chart).
- When processing the image for output, remember to select the color space profile as chosen in the Color Selector (i.e., select the same color space profile in the Process Recipe).
<< About the Color Selector | The Color Balance tool overview >>
Comments
0 comments
Please sign in to leave a comment.