The Auto Adjust White Balance function automatically selects a neutral white balance for each selected variant (providing the Edit Selected Variants function is enabled). Although this option is useful, the Auto Adjust White Balance should be used on a limited range of images taken under similar lighting conditions. Therefore, it is not enabled as one of the default settings for Capture One’s standard Auto Adjust option available from the Adjustment menu or main toolbar.
- Go to the Color tool tab.
- Select the image or images that you want to adjust from the Browser.
- Press the small Auto Adjust (
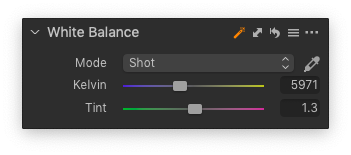
 icon) in the title bar of the White Balance tool. The Temp and Tint sliders and values are updated and the Mode displays the Custom setting option as a reminder that the camera's white balance setting has been adjusted.
 - If further adjustment is required, edge the Tint slider to the left to remove a magenta cast or to the right to remove a green cast.
Setting White Balance using Smart Adjustments
- Select an image you wish to base your Smart Adjustment on, and edit it to your liking
- Navigate to the Adjust tool tab
- Use the selected and edited image as your reference, by clicking Set as Reference in the Smart Adjustments tool
- Untick Exposure, so that only White Balance is calculated
- Select the images you wish to adjust (ensuring Edit All Selected Variants is enabled by going to Image > Edit All Selected Variants)
- Click Apply in the Smart Adjustments tool
<< The White Balance tool overview | Selecting a neutral area with the picker >>
Comments
0 comments
Please sign in to leave a comment.