Copying keywords between pictures

Please help. I don't know how to get this software to do anything. I am trying to copy and paste keywords from one image to another. I open the keyword pane, apply a few, then try to cmd select others from a set. (not necessarily adjacent), then I click the copy/apply button on the upper right (is this two different buttons, or a single button I honestly cannot tell by either looks or behaviour)
Nothing happens.
I tried this piece of advice from elsewhere in the forum (option 2)
The tool is meant to be used without a "clipboard", so the copy is direct from image A to image B. That said:
Select Image A and make adjustments
CMND+CLICK on Image B
SHIFT+CLICK on the Local Copy/Apply tool
Since both images are selected in this workflow your going from A to B with no intermediary, copying from the primary to the secondary. In your described workflow when you choose the local Copy/Paste there is no primary selected, so you are essentially copying from nothing.
-
Select a couple of images in the image browser. The image in the image browser which has the thick border is called "Primary". (You can change which of the selected images is the primary one by just clicking on it)
- Make sure "Edit selected" icon in enabled (or menu Image>Edit all selected)
- Make the image with the keywords your primary (in other words select the image).
- Goto the keyword tool and click on the double arrow (this is the "local" copy&apply), local means only this tool (keywords).

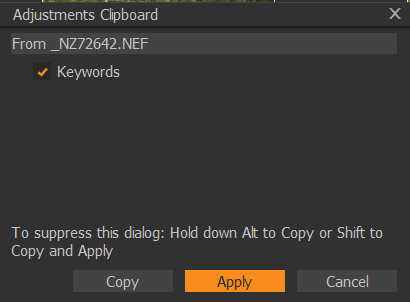
A dialog pops up, click apply.
This local copy&apply works for any tool.
The keyword tool has another possibility.
If you select multiple images as before, the keywords which are not assigned to all of these images are shown with a minus sign. Clicking on the keyword assigns it to all selected images.
0 -
Then there are the two (three) big icons.

The first one is actually two buttons, one for copy, one for apply. Copy copies settings from more than one tool to the Adjustments Clipboard. Apply pastes the selected settings from the clipboard to the selected images.
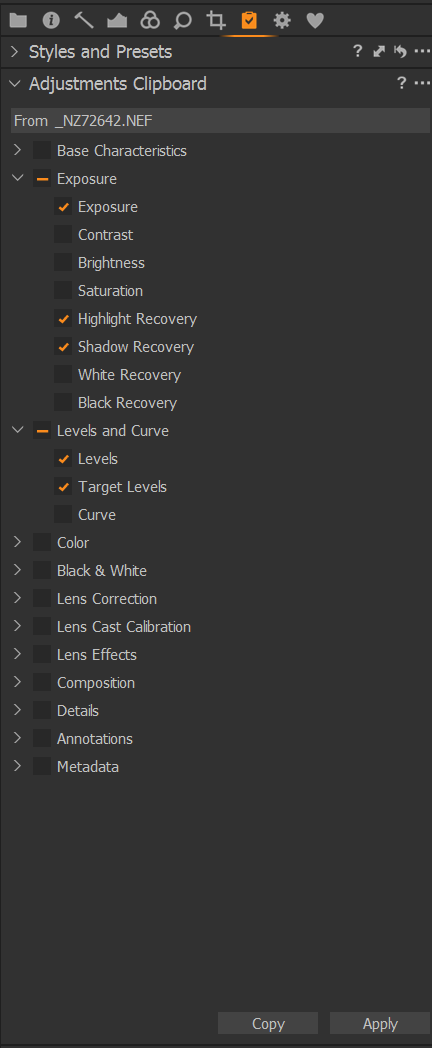
The second icon (double arrrow) is for copy and apply, this opens an Adjustment Clipboard dialog, this works similar.
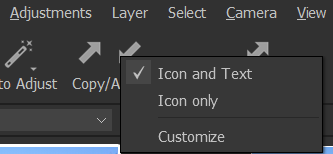
If you don't see these icons, goto the big icon panel and right-click to customize:
 0
0 -
Thank you so much for taking the time to explain this. I will give this a go...
0

Post is closed for comments.
Comments
3 comments