Capture One enables you to create a mask quickly from a color range selection using the Color Editor tool.
- Go to the Color Editor tool and select the color or area intended for local adjustment on the image using the Color Editor tool’s color picker (pipette icon).

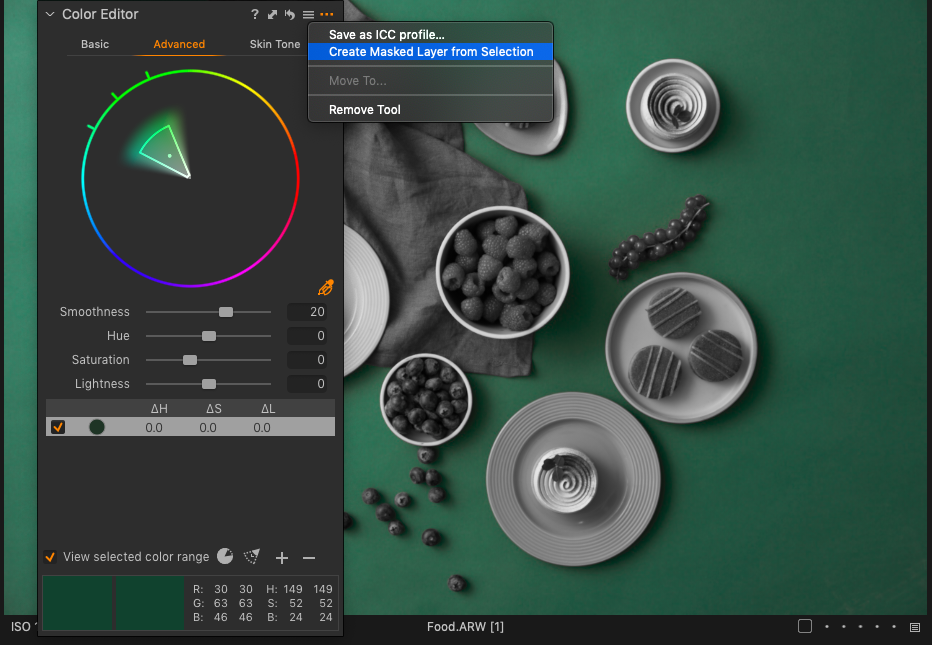
- When modification of the range is required, use the color picker from the Advanced or Skin Tone options or cursor group and adjust the wire-frame. When multiple selections are made using the Advanced option, only the highlighted selection is used for the mask. However, it is possible to make a mask for each selection. To display the selected color range in the Viewer, enable the View selected color range option.

- With the color selection highlighted in the Color Editor, click on the Color Editor tool’s Action menu, the (...) icon, and select Create Masked Layer from Selection. A dialog opens showing the progress of the creation of the mask.
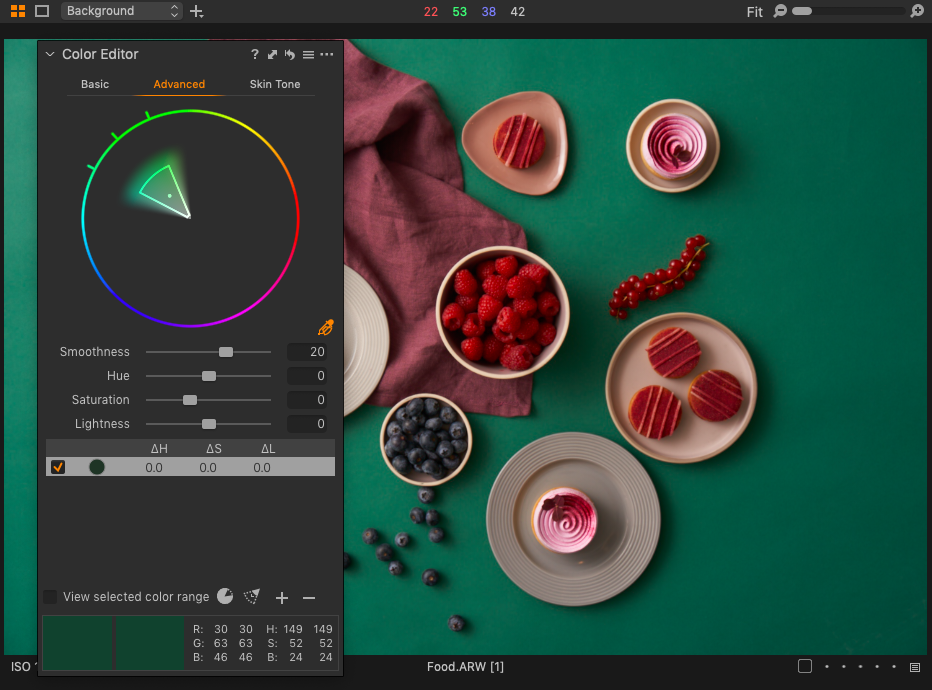
- A new separate Adjustment Layer is created in the Layers tool, complete with a corresponding mask for that color selection.

- Tidy up areas not needed using the Erase Mask (keyboard shortcut E).
- The mask can now be used to apply adjustments.
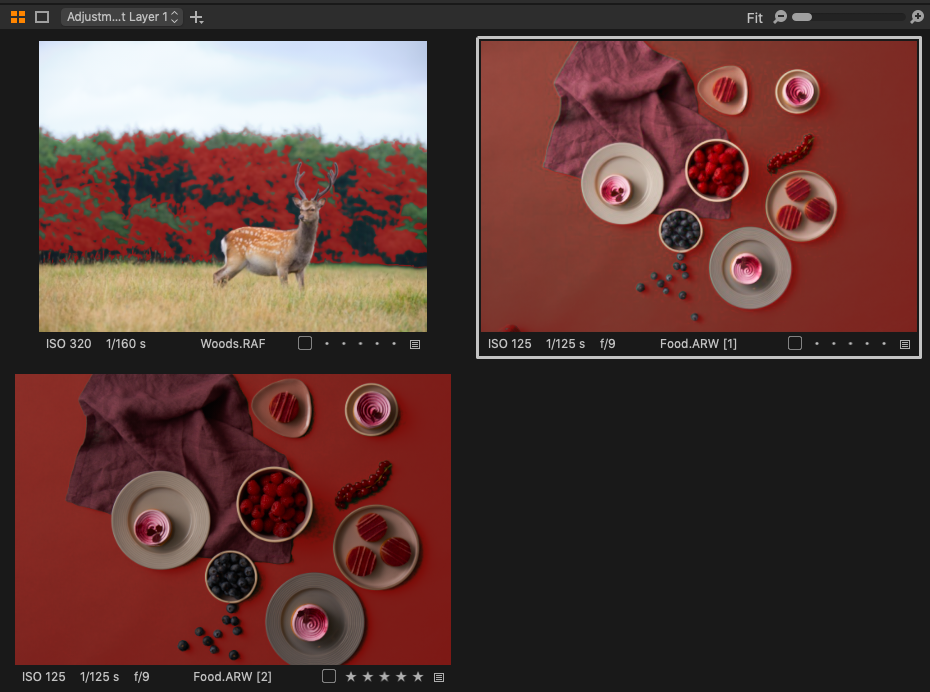
The Color Editor tool’s ability to automatically create a mask from a color-based selection can also be used for multiple images. This is particularly useful for batch editing of an identical subject, provided that the same selection is required for masking and subsequent adjustment. The following instructions assume that the Edit All Selected Variants option is selected (if not, click on the multiple thumbnail icon in the Toolbar, turning the icon to orange). Individual images may require tidying up using the Erase Mask option.
- Select a variant group or a series of similar images captured in a single session from the Browser.
- Go to the Color Editor tool and select the color or area intended for local adjustment on the primary variant using the Color Editor tool’s color picker (pipette icon). When greater precision is required, use the color picker from the Advanced or Skin Tone options or cursor group.
- To display the selected color range in the Viewer, enable the View selected color range option.

- With the color selection highlighted in the Color Editor, click on the Color Editor tool’s Action menu, the (...) icon, and select Create Masked Layer from Selection. A dialog opens showing the progress of the creation of the mask.

- A new separate adjustment layer is created in the Layers tool for each image variant, complete with a corresponding mask for that color selection.
- The masks can now be used to apply adjustments to them.
<< Working with a color range selection | Applying Styles and Presets to layers >>
Comments
0 comments
Please sign in to leave a comment.