When preparing variants for output, any annotations made can be rendered with the image during processing, which is useful if a quick proof is required. You can also include annotations as a separate layer when processing the image to a PSD. This enables the annotations to be kept separate from the image as an individual object in a layer, yet allows collaborators to view and remove the annotations when the file is ready to be printed or published, for example.
Note that the following steps detail the method using Export Recipe from the Export tool tab. If there is no need for including a watermark as a layer, the simpler Recipe option available using the Export Variants command (File -> Export Images -> Variants) can be used instead.
- Go to the Export tool tab and either create a new dedicated recipe or select an appropriate recipe from the Export Recipes list. The recipe is then highlighted in orange. When multiple recipes are to be selected for processing, the following selection will have to be made for each recipe in-turn.
- In the Export Recipes panel, select the Metadata tool.
- Choose one of the following options:
- To exclude the retouch notes from processed images, deselect the Annotations check-box.
- To render as a part of the image, select the Annotations check-box (all image formats, other than PSD).
- To render as a separate Layer, select the Annotations check-box and choose PSD as the file format in the Format ad Size tool.
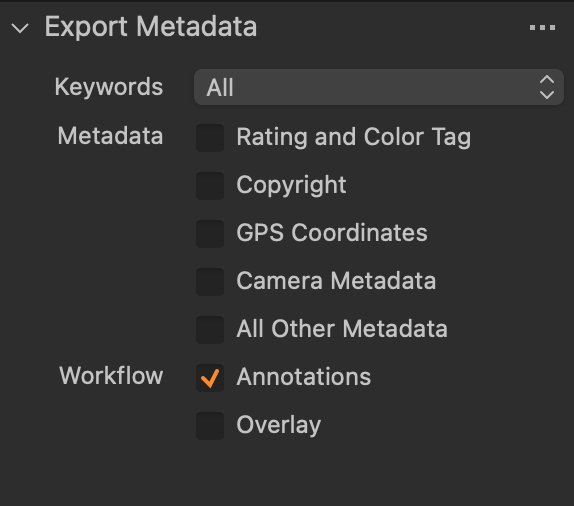
- To exclude the retouch notes from processed images, deselect the Annotations check-box.
- Selecting the option will automatically save the choice to the recipe.
- Select Export in the Export Recipes tool. The image is processed accordingly.
<< Sharing annotations among Capture One users | Using External Editing >>
Comments
0 comments
Please sign in to leave a comment.