Setting a custom white balance without a gray card is simple and effective though choosing an area in the image requires some care. Otherwise, some unexpected results will occur.
Select the white balance picker (eyedropper) (W) and click-on the brightest white area in the image that has some detail. Do not select specular highlights or other areas that are clipped as the results could be unpredictable and undesirable. If there is no white surface in the image, look for a bright gray area.
Repeated selections using the White Balance picker overrides the previous setting and, like other tools in Capture One, has no detrimental effect on your source image file.
- Select an image or images in the Browser.
- Go to the Color tool tab. In the White Balance tool, select the White Balance picker (eyedropper icon) and click-on a bright white or light neutral area in the image with detail (do not select specular highlights or other areas that are clipped). Note that the White Balance picker is also available in the cursor toolbar.
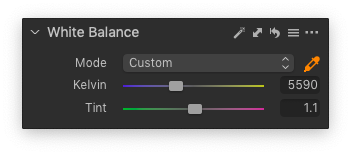
- Repeat the selection until you are satisfied with the result. The previous Temp and Tint values will be overwritten and updated. The Mode field will display the word Custom to show that you have overridden the camera's settings.
<< Setting White Balance automatically | Setting a custom white balance using a gray card or chart >>
Comments
3 comments
What bothers me with this tool is this (step 3 in the guidance):
"Repeat the selection until you are satisfied with the result."
The problem is that even in a neutral area every pixel is more or less different colour, due to sensor noise. Now the tool registers the value of a single pixel, and I get a different result for every click and I can't be sure which one is the most neutral setting. It is frustrating.
I think the tool should work like this:
- You can drag from one point to another, and the tool selects a circular area (like when I'm drawing a mask). Then the average colour value of the area is calclulated and that is used for determining the white balance. Now you would have like hundreds of pixels counted in and colour noise would not be a problem. Consistent results every time.
- If you simply click on a pixel it would work like before.
I have proposed this by mail maybe two years ago, but haven't seen it implemented so far. I think this is a significant issue, because white balance is one of the first things to do for almost every editing task, and improving this interface would make things quicker and nicer.
I agree...
Not only do I agree, I came to the C1 manual today to find out exactly how to select an area in which the average white balance could be calculated. It looks like this is still an outstanding request x 4 years. To emphasize what Seppo Helle said, if the user single-clicks on a point, then the white balance tool should work as it does now. However, if the user clicks and drags, then the white balance should be calculated within the box drawn by the drag. IMO this is the only way to measure white balance effectively and C1 does not currently provide a solution.
Please sign in to leave a comment.