Guides can be added and displayed over the image in the Viewer as an aid to getting the composition right. It is particularly useful when shooting tethered or as a means to perfect the image cropping.
- Go to the menu and select View -> Guides to toggle the Guides visibility on and off.

You can assign a keyboard shortcut to this command. If you want to assign a keyboard shortcut command to toggle the visibility of the Guides on and off, select Edit -> Edit Keyboard Shortcuts… and find the Guides command. Note that you can also assign additional keyboard shortcuts to other related Guides commands under Customize Guides in the Edit Keyboard Shortcuts dialog box. See this article for more details:
Editing keyboard shortcuts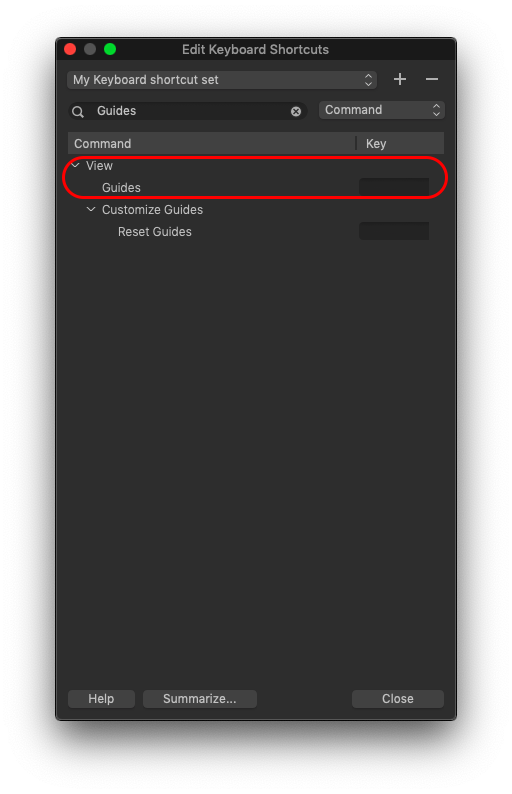
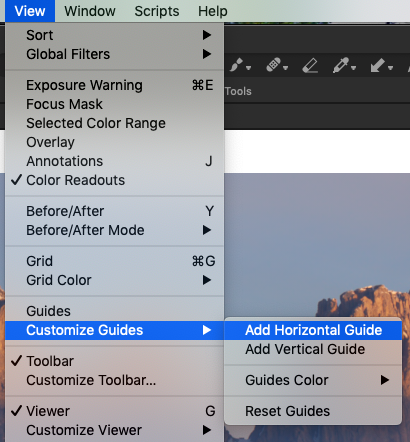
- Multiple guides may be added from the main menu by selecting View -> Customize Guides -> Add Horizontal Guide or Add Vertical Guide.
- The guides can then be dragged into the proper position using the Select (v) cursor tool.
- You can select one of the six available Guide colors to ensure that they will be easy to see against the image subject. You can choose between black, white, red, yellow, magenta or cyan by selecting View -> Customize Guides -> Guides Color from the menu. The default color is red.

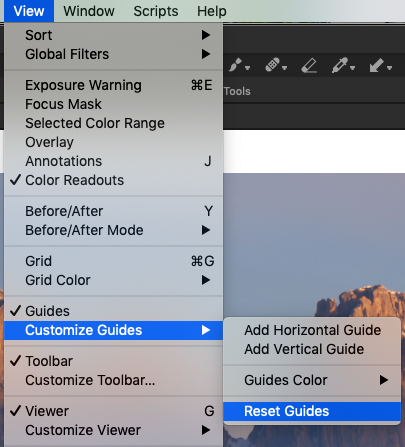
- If all of the guides displayed should be removed, select View -> Customize Guides -> Reset Guides.
If only a single Guide line needs to be removed, simply click on it with the Select (v) cursor tool and drag the Guide line to the edge of the frame.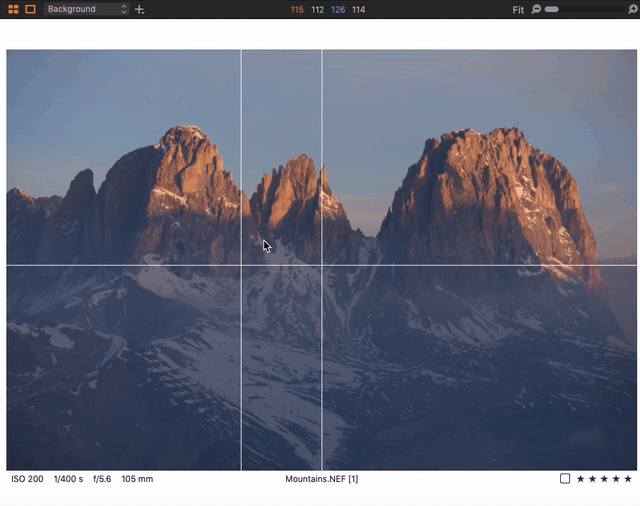
- To hide the Guides, select View -> Guides from the main menu to toggle the view off.

Note that Capture One Enterprise has a Guides tool with additional features for precise placement as well as Presets.
Comments
5 comments
I've figured out how to only have one horizontal and one vertical guide (I think) by adding the "Grid Tool" to one of my Tool Tabs and then changing the Long Edge and the Short Edge to "2".
For the life of me, I cannot move either guide. Typically, I'll move the vertical guide down to check if something is straight. According to the documentation, if I switch to the select tool (V), I can move the guides wherever I want. This isn't working for me. Do I need to change a setting somewhere in order to do this?
Currently using Capture One 20. Thank you!
Hi Mat,
Please, go to the main menu and make sure that the Guides option is enabled.
There will be one vertical and one horizontal line. When you hover over any line and click on it, you will be able to move it.
You may customize Guides in the View menu and add extra horizontal or vertical lines if needed.
Thank you Lily!
So simple. I had the Grid option enabled instead of the Guides.
Hello!
Is there a way / workaround to have Guides presets in a non-enterprise COP?
I like to have a 3x3 guides setup and I can't find a way to save it, I have to set it again in every new session, guide by guide, loss of time.
It seems the answer to my question is no and I really, truly, don't understand why you wouldn't add this feature to regular pro users? (it's a non-sense to me). Thanks
I REALLY wish I could save different guide sets. One client likes *this much* room around their product, another client likes *this much*. Would help speed up my workflow!
Please sign in to leave a comment.