The Recipe’s File tab has an option to specify the destination location for the processed variants. To simplify the process when more than one recipe is selected, defer to the Output Location tool instead.
- Go to the Output tool tab.
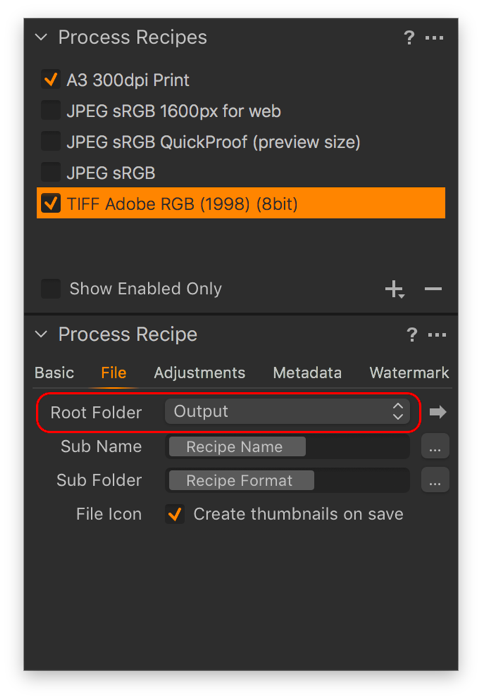
- Click on a recipe from the Process Recipes dialog to highlight it (i.e., highlighted with an orange or gray bar) or create a new recipe from specific settings and then select it by highlighting it.
- Go to the Process Recipe panel immediately below, and select the File tab.
- From the Root Folder fly-out menu, choose where to export the processed files for the selected recipe. Select from the following options:
- Output Location (default) - this defers the placement of processed image variants to the Output Location tool.
- Image Folder - this option returns the processed image files back to the folder with the original unprocessed images.
- Select Folder… - you can select an existing folder or create a new folder either locally or on an external drive, flash-disk or network drive. If you select the Desktop as the output location, be sure to create a new folder for the images from the resulting dialog or add a folder in the Sub Folder option. Note that you can verify the folder location using the arrow-shaped icon next to the fly-out menu.
NOTE: With the release of Capture One 21 (14.3.0) Output tool tab has been removed and all export tools have been moved into the new Exporter.
Read more about the Exporter in this article.
Read more about the Location tool in this article.
<< Output Location and Folder Naming overview | Creating folders from within the recipe >>
Comments
0 comments
Please sign in to leave a comment.