If you have an Apple iOS device with the Capture Pilot app installed (available free to download from the Apple App store), you can use it to wirelessly control and capture images with the camera tethered to a computer running Capture One. When connecting a Phase One camera system, the Capture Pilot app’s Camera Control function is automatically enabled. Otherwise, it is available for a nominal fee as an in-app purchase. Please ensure your camera is compatible before purchasing Camera Control.
- Connect a supported camera (via a FireWire or USB cable as appropriate) to the computer running Capture One Pro.
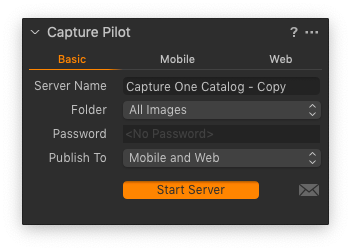
- From the Capture Pilot dialog located at the bottom of the Capture tool tab, select the Basic tab, if not already selected.
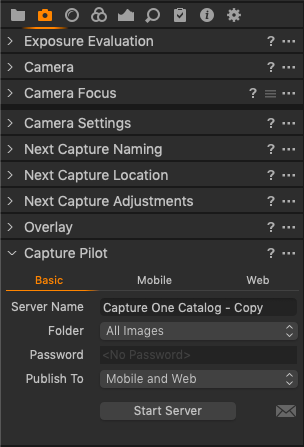
- The Capture folder is selected by default. However, if you have chosen a new capture folder, click on the Folder fly-out menu and select the relevant Capture folder from the list.
- Click on Start Image Server.
- Open the Capture Pilot app on your iOS device and select the Session or Catalog name displayed under Local Servers. When successfully connected, previously captured images from the capture folder will be displayed.
- Press the Camera icon in the bottom-left corner of the Capture Pilot display on your iOS device. A floating window will appear on screen.
- Swipe the on-screen aperture, shutter, ISO or EV dials to make adjustments.
- Depending on the camera model, certain parameters, such as File type, Exposure Program, and White Balance, can be selected from the display. Select the parameter and choose from the menu.
- Press the on-screen Shutter button to trigger the shutter and expose an image. Image files are saved to a designated Capture One folder on the computer. Note that image files are not saved to the iOS device, only previews.
<< Using an overlay when shooting tethered | Displaying battery status >>
Comments
0 comments
Please sign in to leave a comment.